Browsing Category

DIY

DIY

20 Magazine-Worthy IKEA Hacks

February 5, 2015

We are loving the transformation our $70 IKEA TV stand made with just a splash of Chalk Paint™ decorative paint by Annie Sloan and some funky hardware. Both my husband and I have been daydreaming about what we are going to paint next. I’ve been eyeing up our HEMNES IKEA bed side tables and matching dresser but I’m not sure if I can commit to something so huge and dramatic.

I love seeing what other DIYers are doing with their IKEA furniture. It actually blows my mind what you can do with a fresh coat of paint and some new hardware. You can inexpensively customize your furniture every season, if you so wish!

Here’s my inspiration board on Hometalk with all my favourite IKEA Hacks and transformations. Looking through these projects really inspires me to bite the bullet and do a complete overhaul on our bedroom set.

Which is your favourite project? Do these inspire you to revamp your IKEA wares?

20 Magazine Worthy Ikea Hacks via www.mommyzoid.ca

Stephanie @ Mommyzoid PS: I’ll be sharing this post on these amazing blogs!

DIY

Ikea Hack – Featuring Chalk Paint by Annie Sloan

January 23, 2015


Ikea Hack via www.mommyzoid.ca

My husband is a major DIYer. He loves to up-cycle, build, and create but on a larger scale than myself. I’m more of a handmade card kind of gal myself. He takes on the larger projects. That’s why I’m handing over the DIY reins when it comes to my blog by regularly featureing a “Daddyzoid DIY”.


Ikea Hack via www.mommyzoid.ca

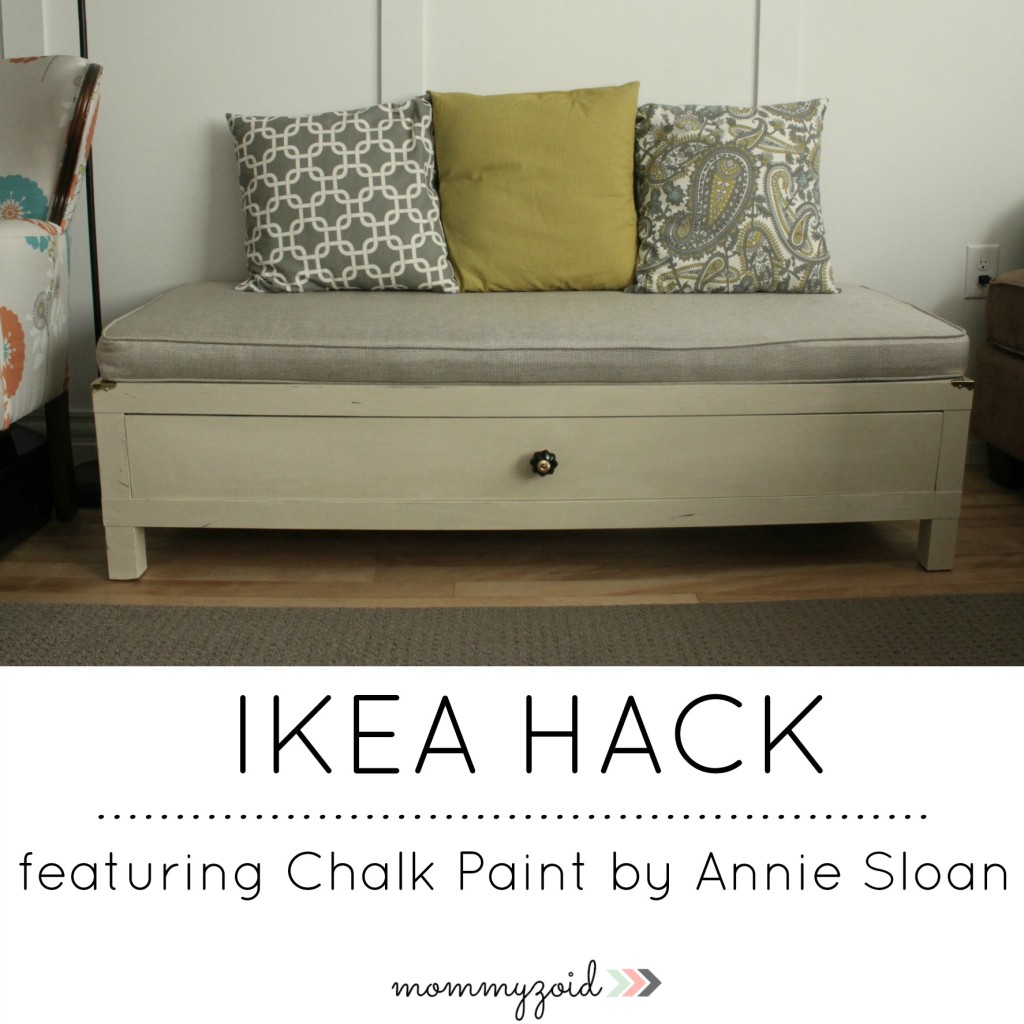
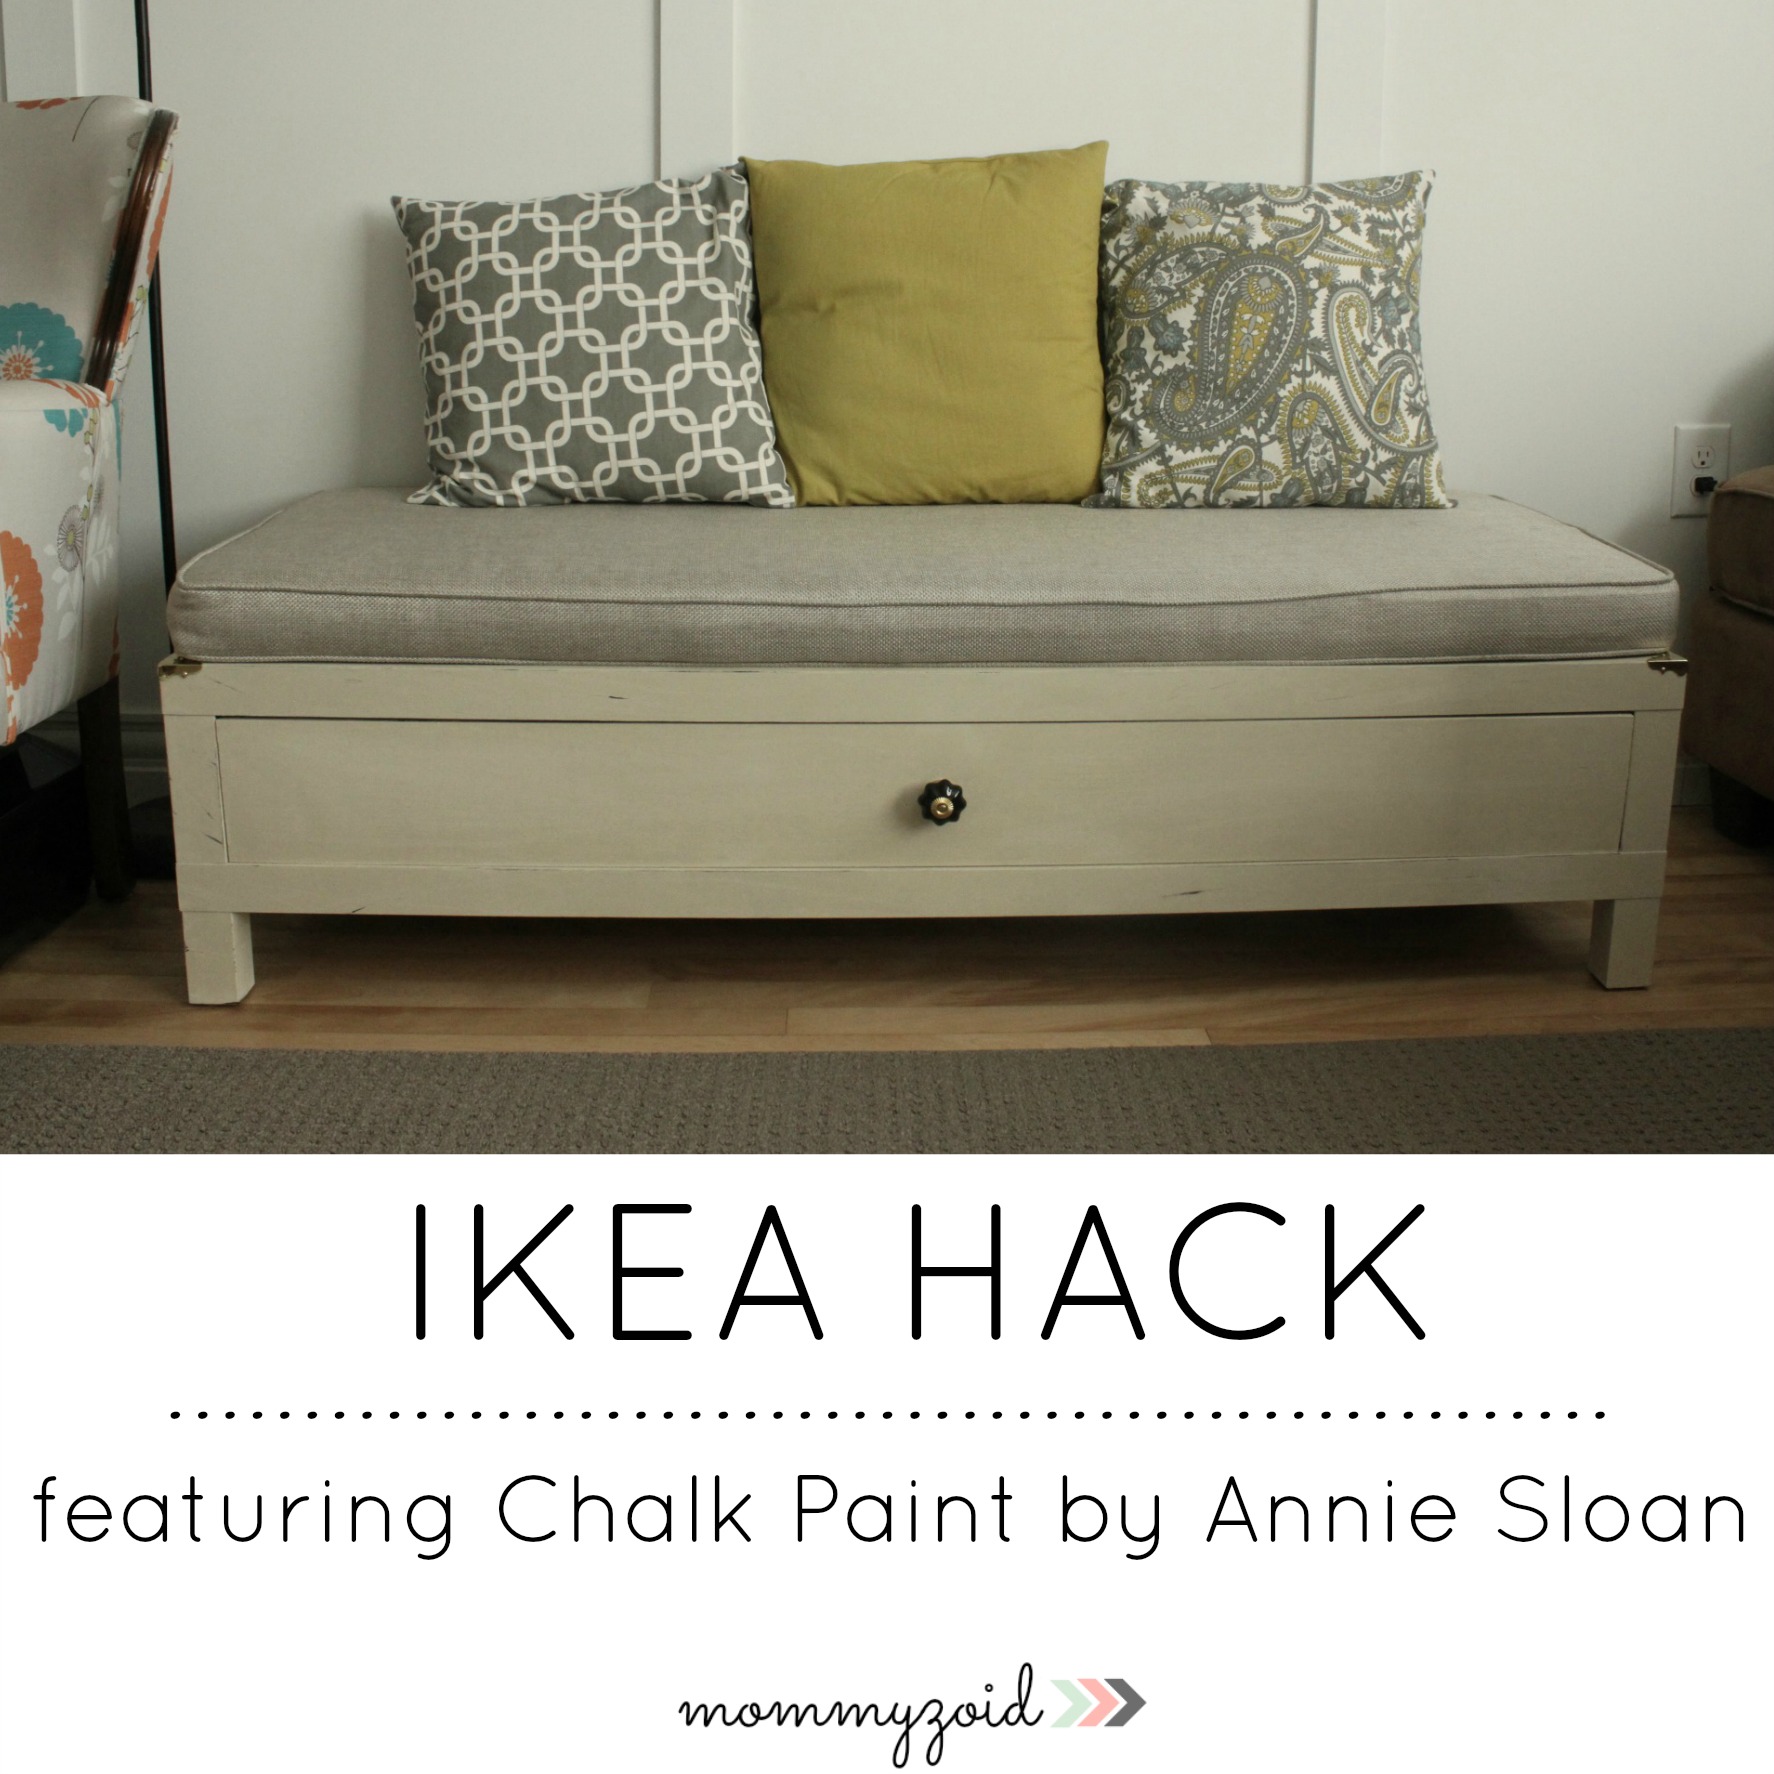
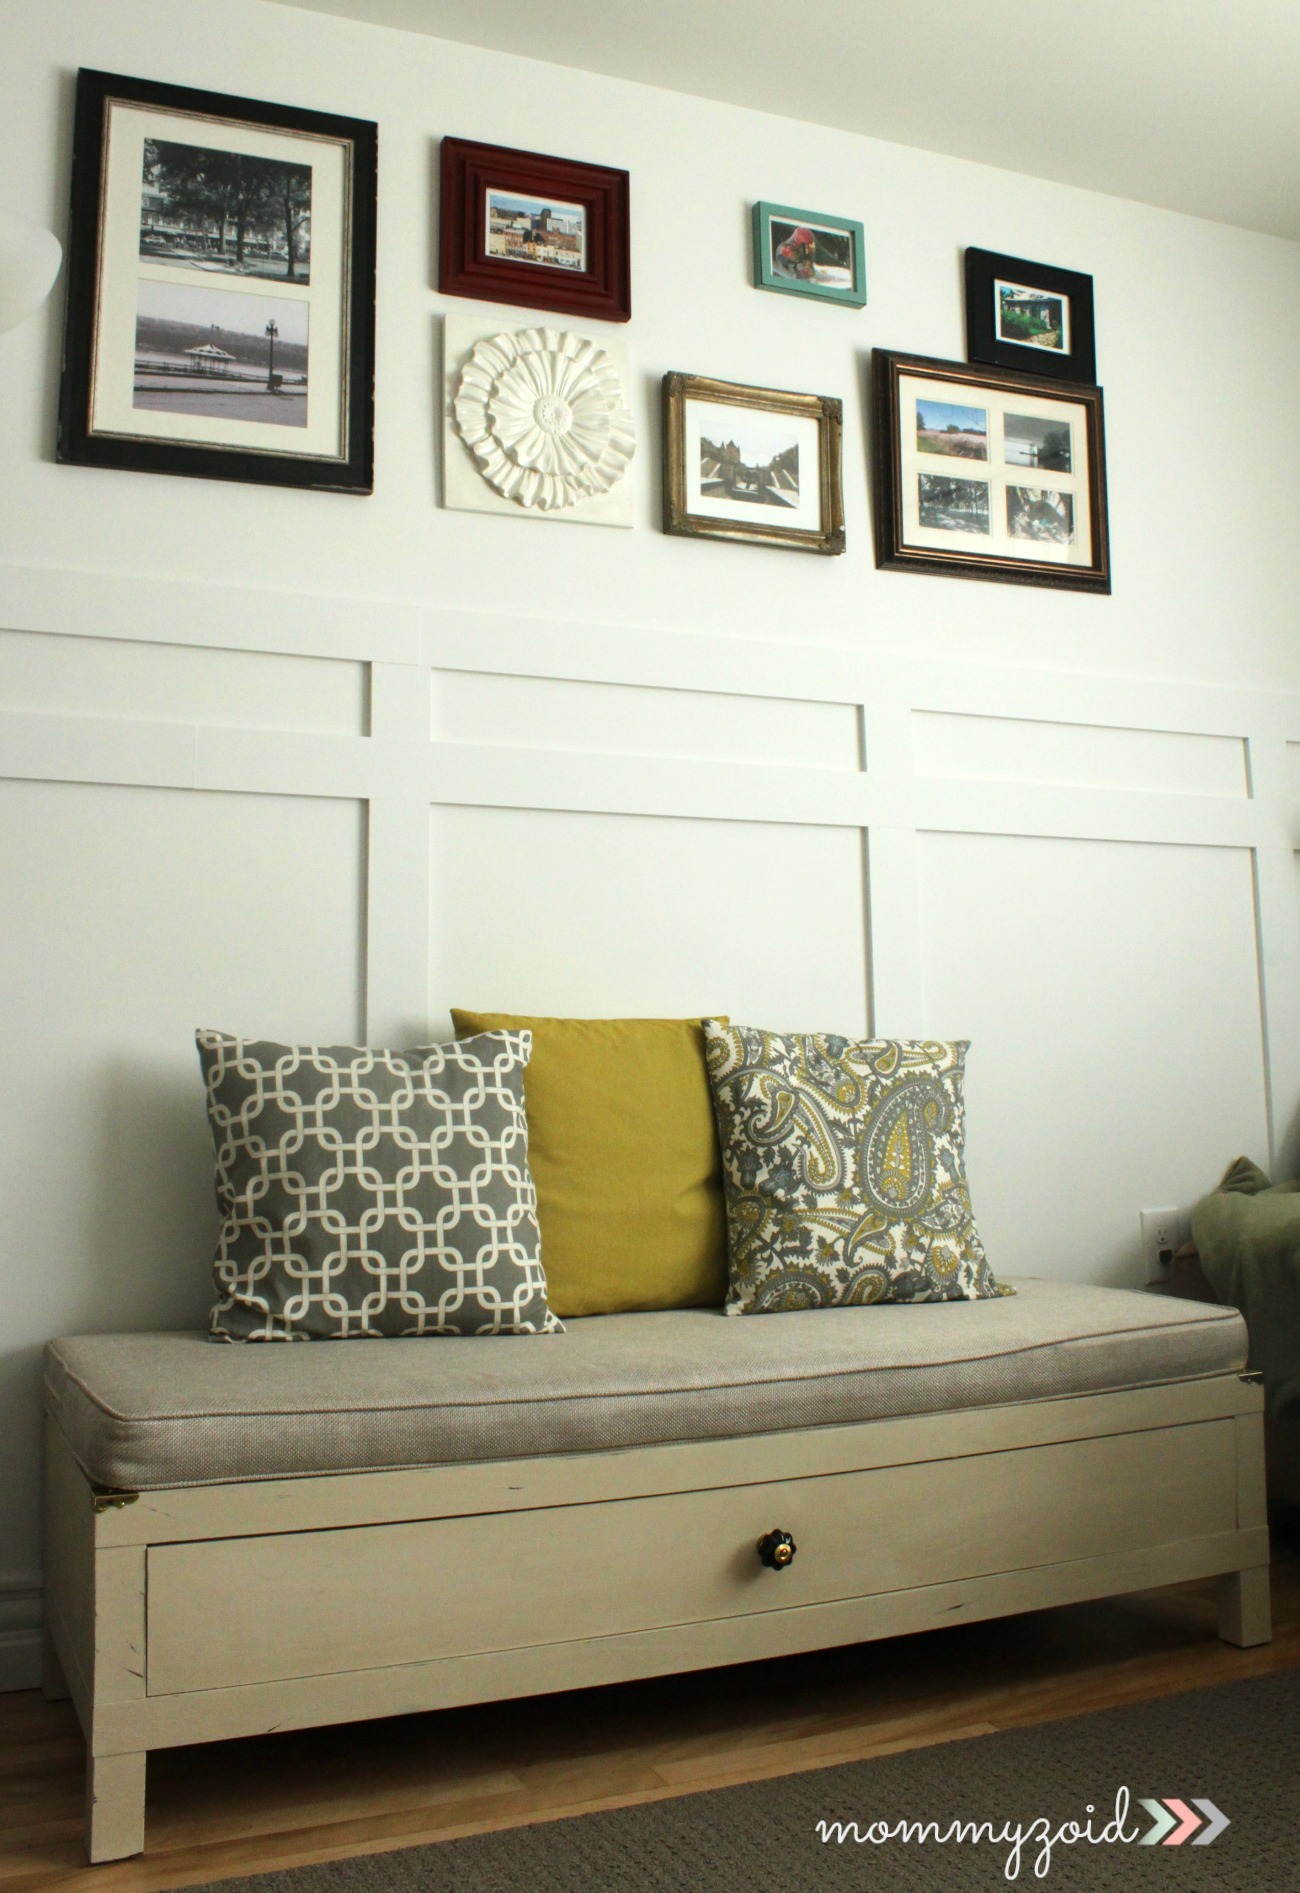
This plain jane $70 Ikea TV bench has seen countless transformations. In our first apartment it served as an entertainment centre. It held our TV and all our DVDs. Once we moved into our condo we used it as a coffee table. Then we had a cushion made to fit on top to make a bench for extra seating in our living room. Now it’s time for another incarnation of this piece.

My husband has been wanting to experiment with Chalk Paint™ decorative paint by Annie Sloan for quite some time and when he mentioned a new life for our aging Ikea TV bench, I was game! There was nothing structurally wrong with the bench and no scratches. It was just starting to look tired and I guess we were growing tired of looking at it. The feeling was mutual, I’m sure.

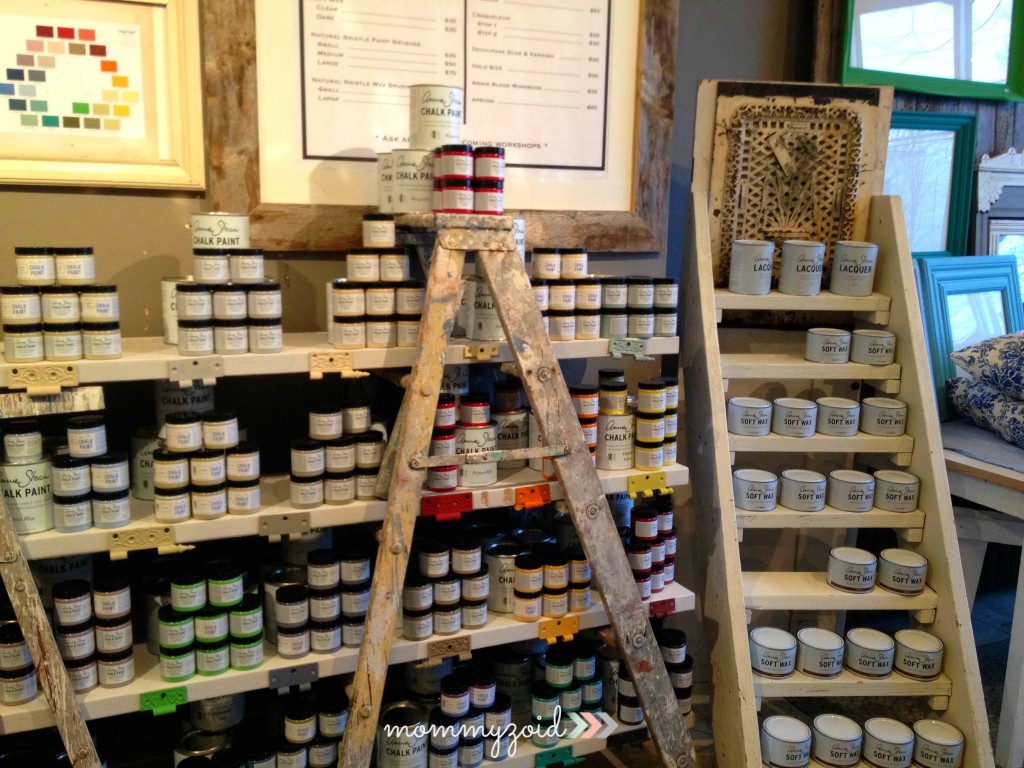
About a 10 minute walk from our house is one of the two Chalk Paint™ retailers in my province. Rusty Hinges is one of my favourite stores in Halifax and owned by the sweetest most down to earth lady I’ve ever met! She helped my husband figure out how much paint he’d need to cover the table/tv stand/bench seat.

Ikea Hack via www.mommyzoid.ca Ikea Hack via www.mommyzoid.ca

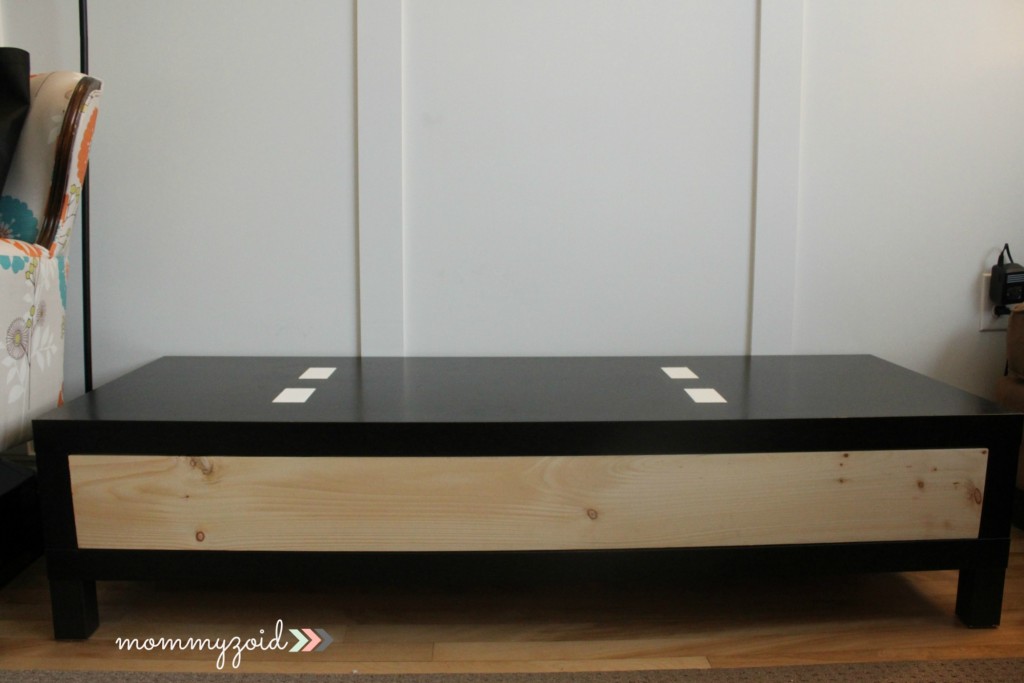
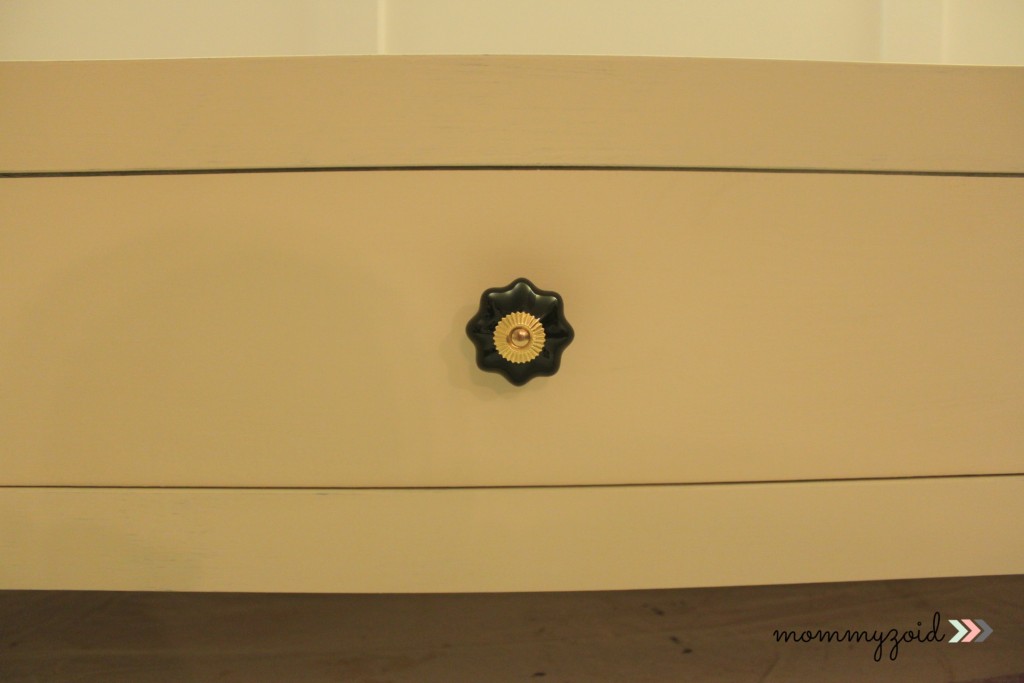
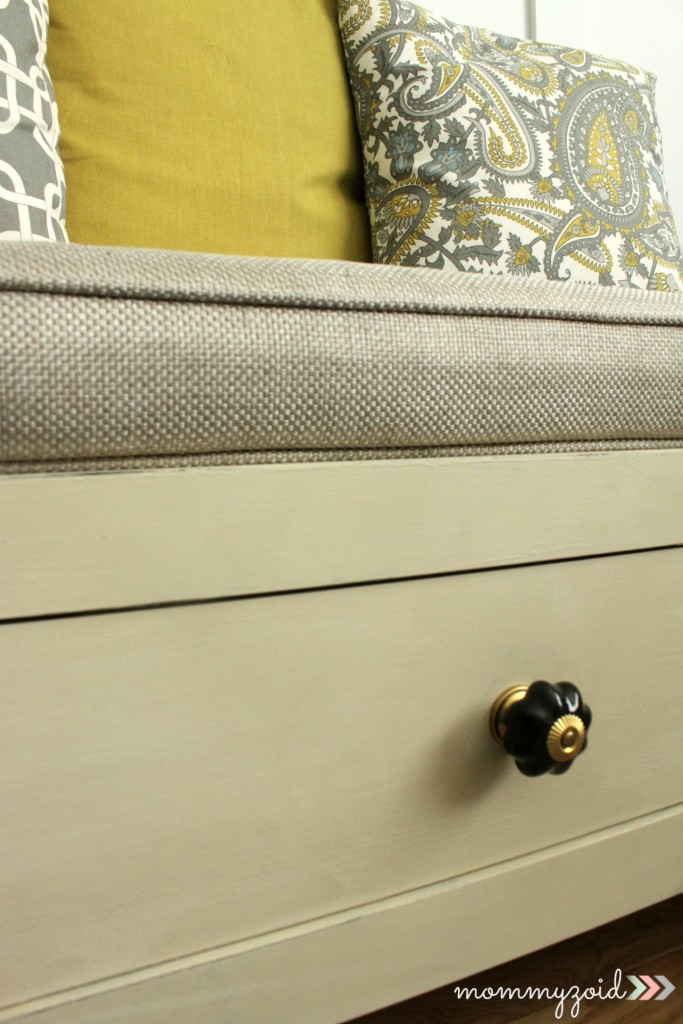
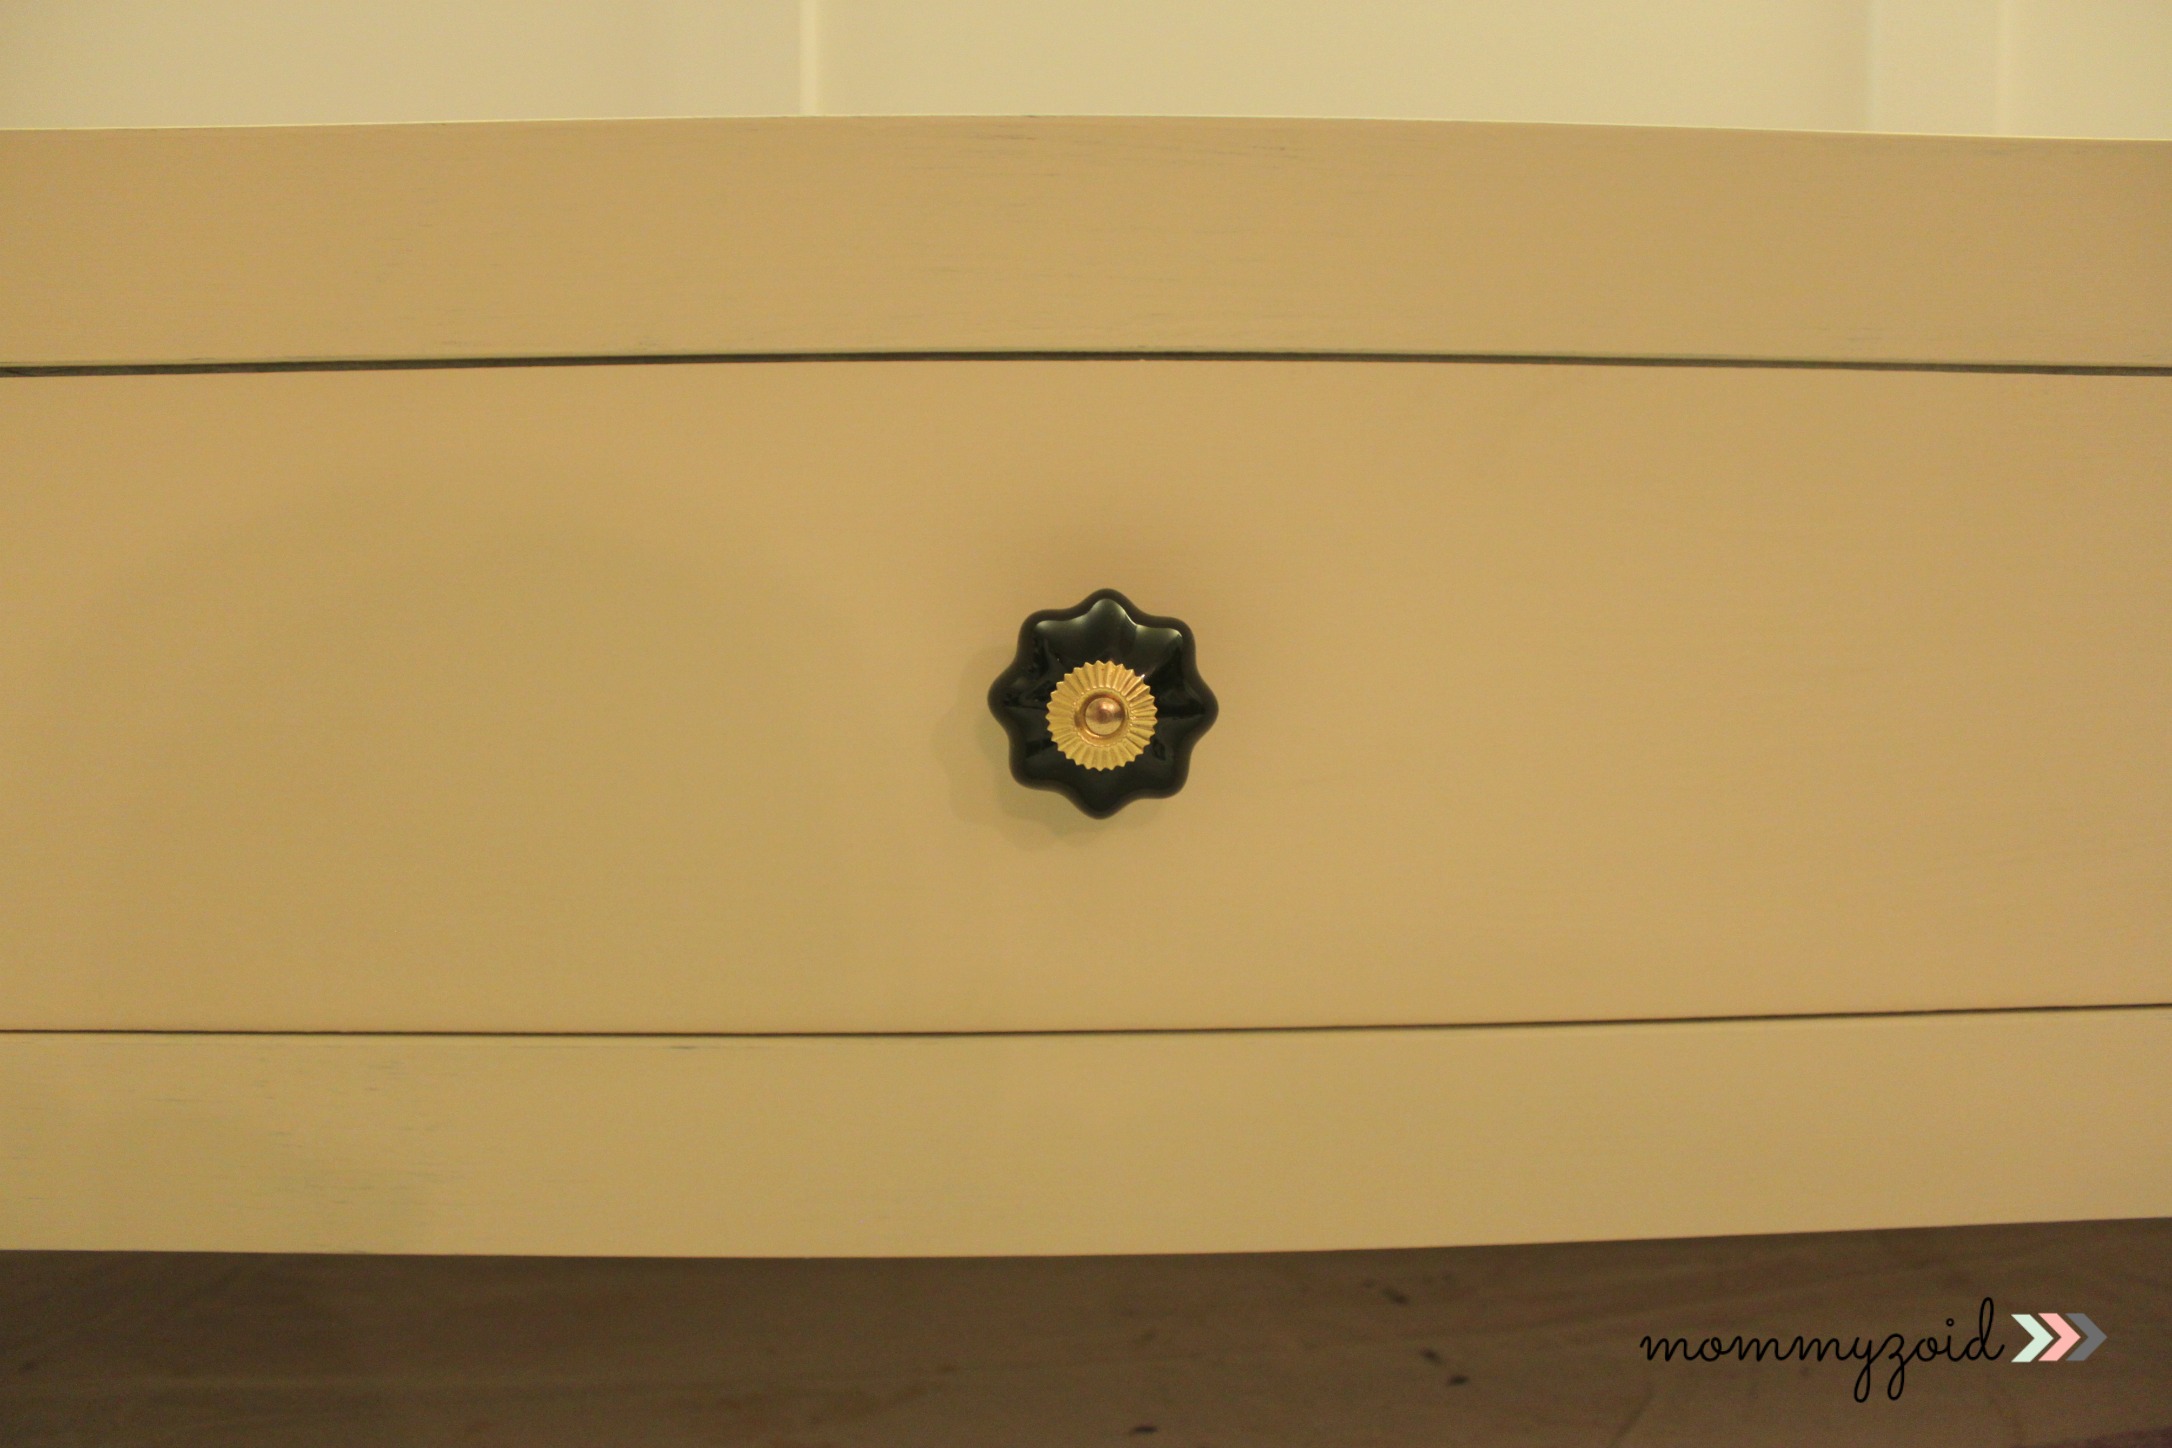
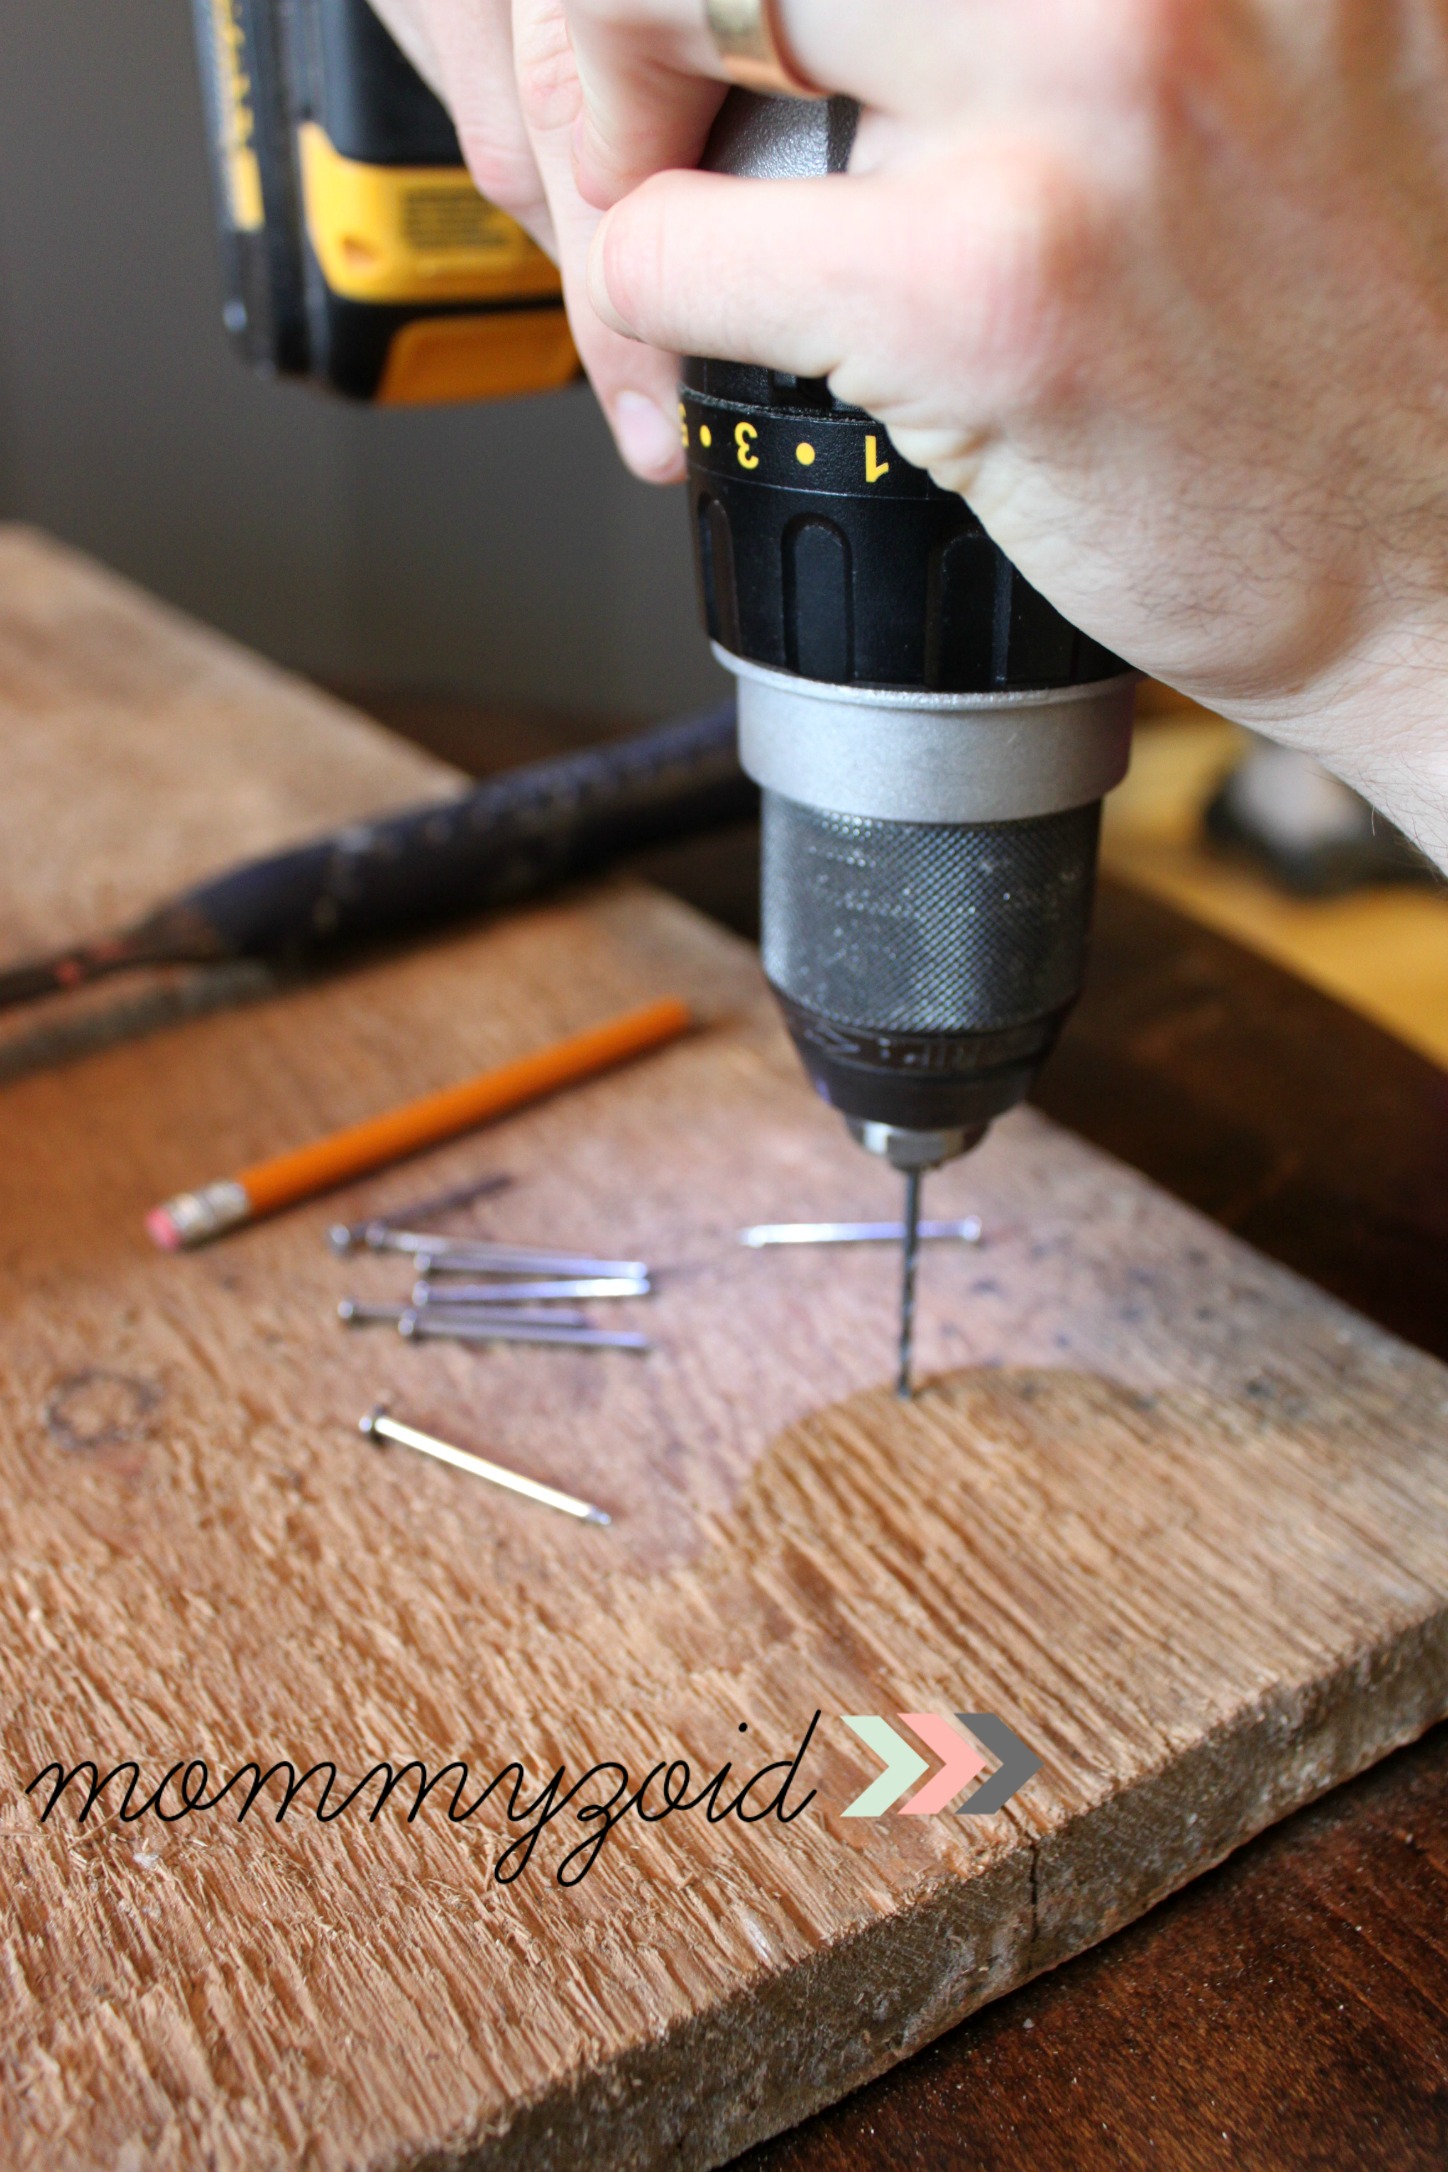
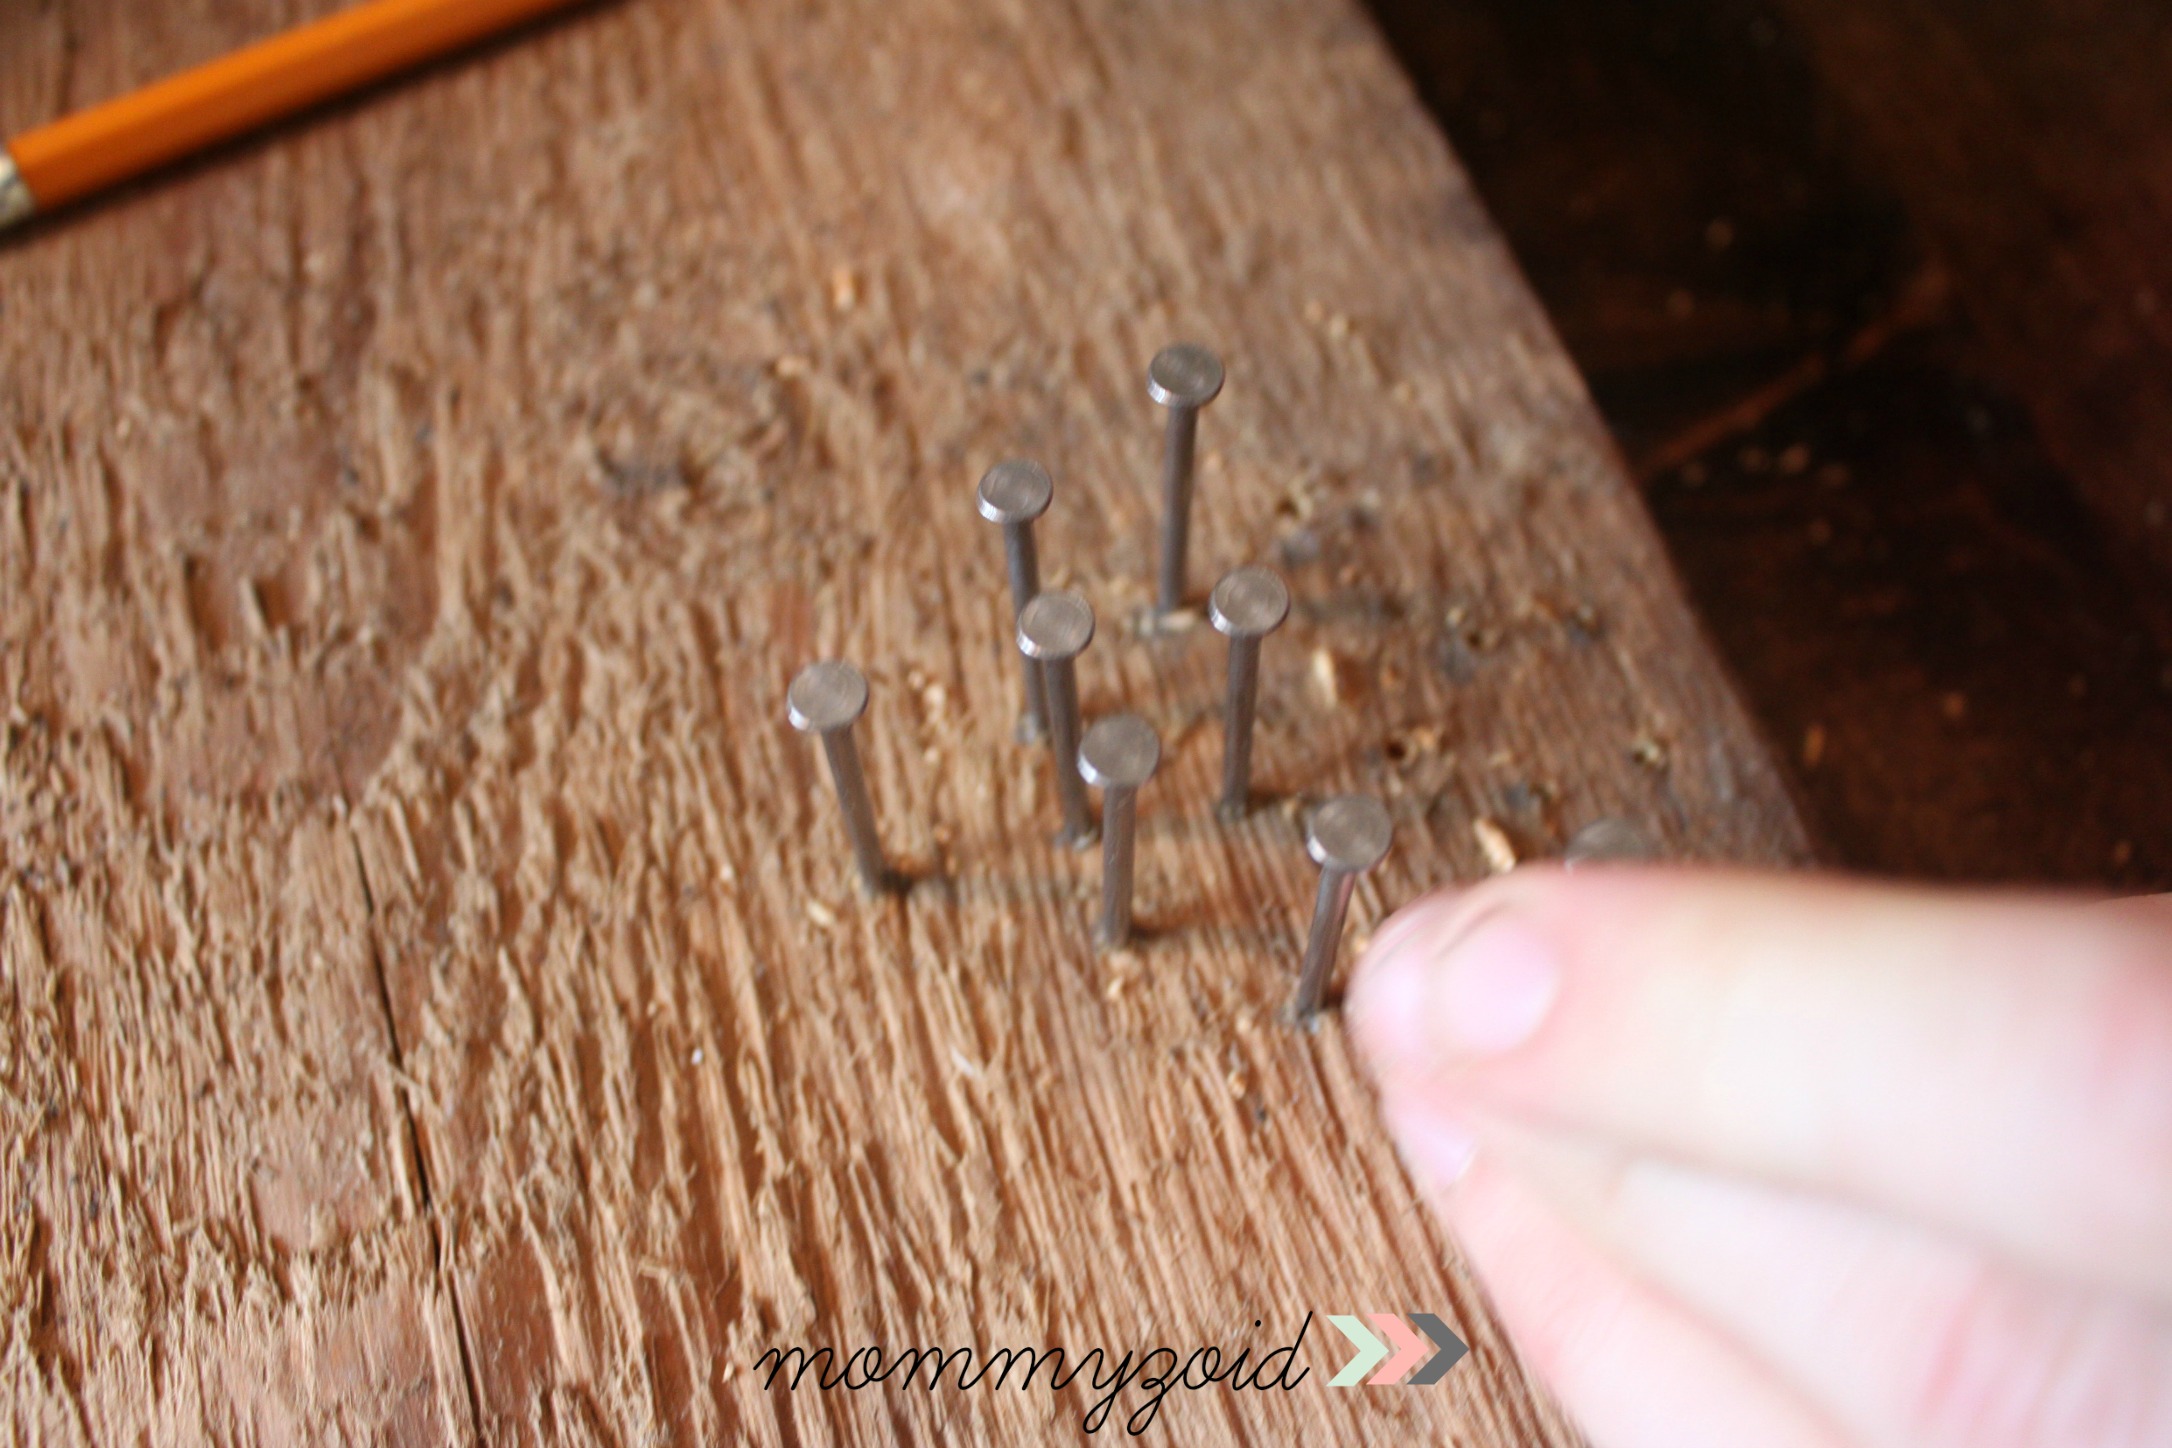
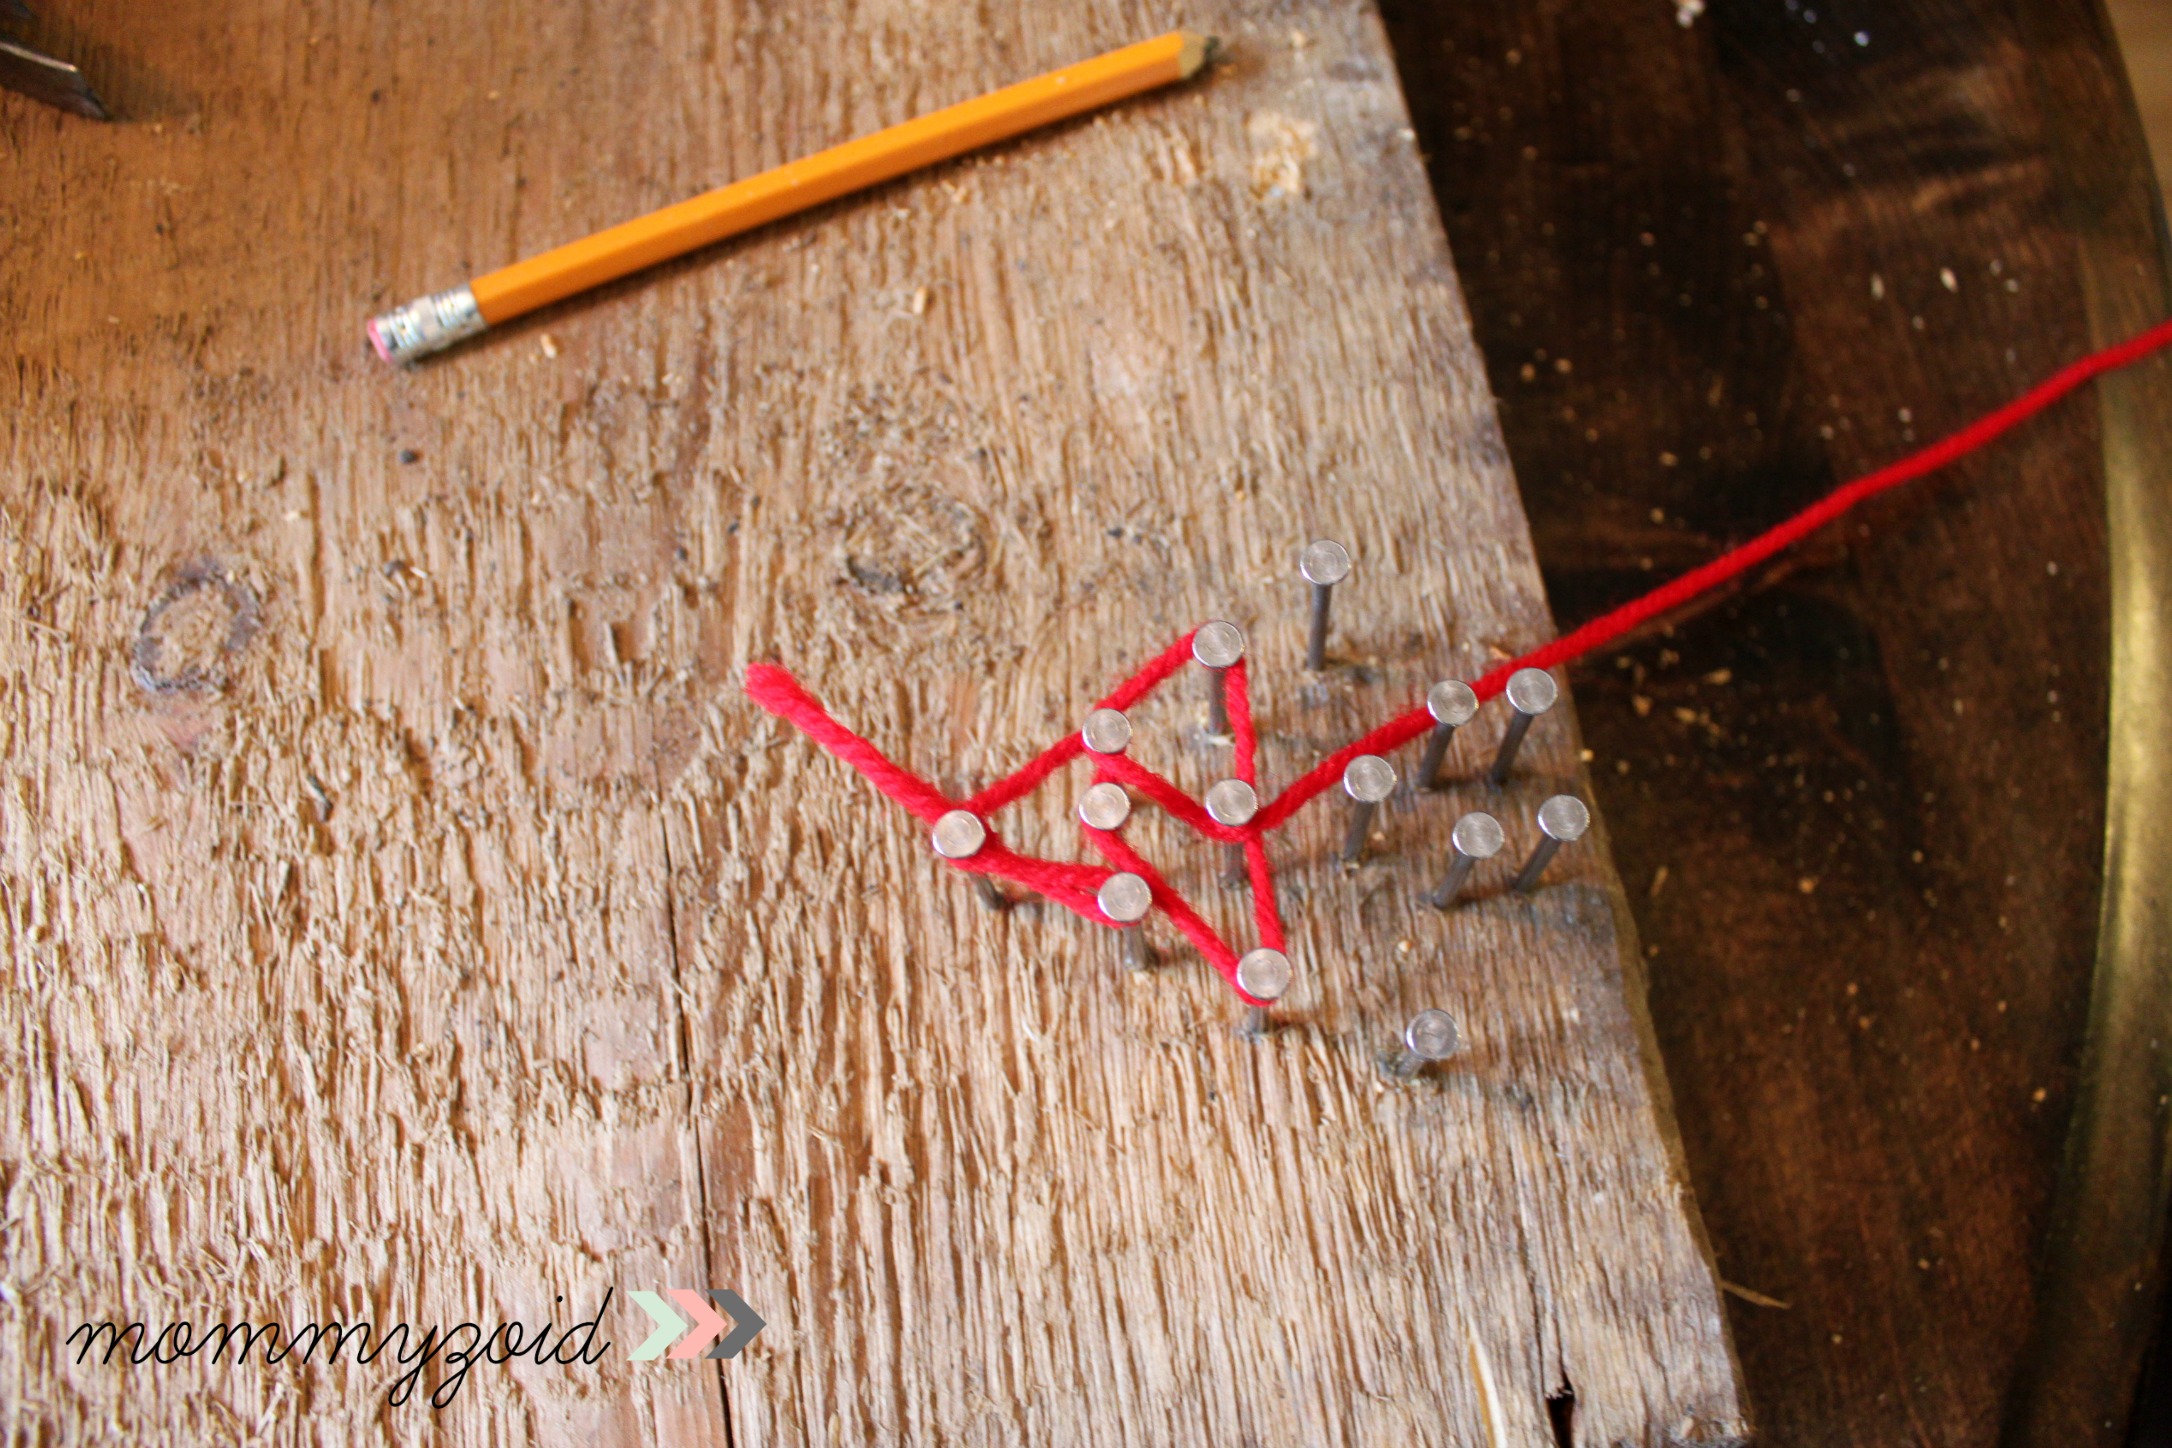
Once the baby was in bed for the night, he set to work on the transformation. He had a piece of wood cut to fit the opening of the bench to create a door so that we could stash our junk out of sight. We found a funky knob at a local shop called The Independent Mercantile Co . He attached that to the centre of the door.

Ikea Hack via www.mommyzoid.ca

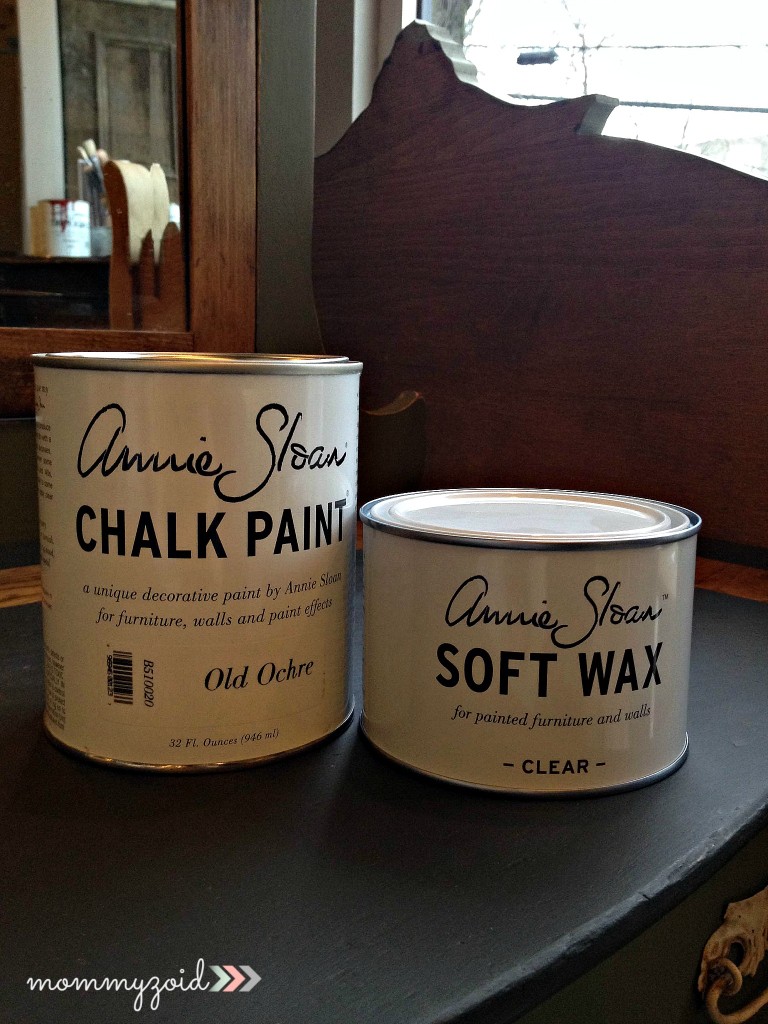
Then the fun part began — the painting! The best part about using Chalk Paint™ for this project was there was no need to sand or prime the bench. He literally just shook the can, opened it up, and started painting. Even on cheap melamine! For the style we were going for, brush direction wasn’t a concern. He applied the paint in circles, back and forth, and up and down. He only needed to use the 4 oz sample size to cover the bench with two coats. According to the website, 4 oz covers an area of about 12 sq ft. A little bit went a really long way!

Ikea Hack via www.mommyzoid.ca

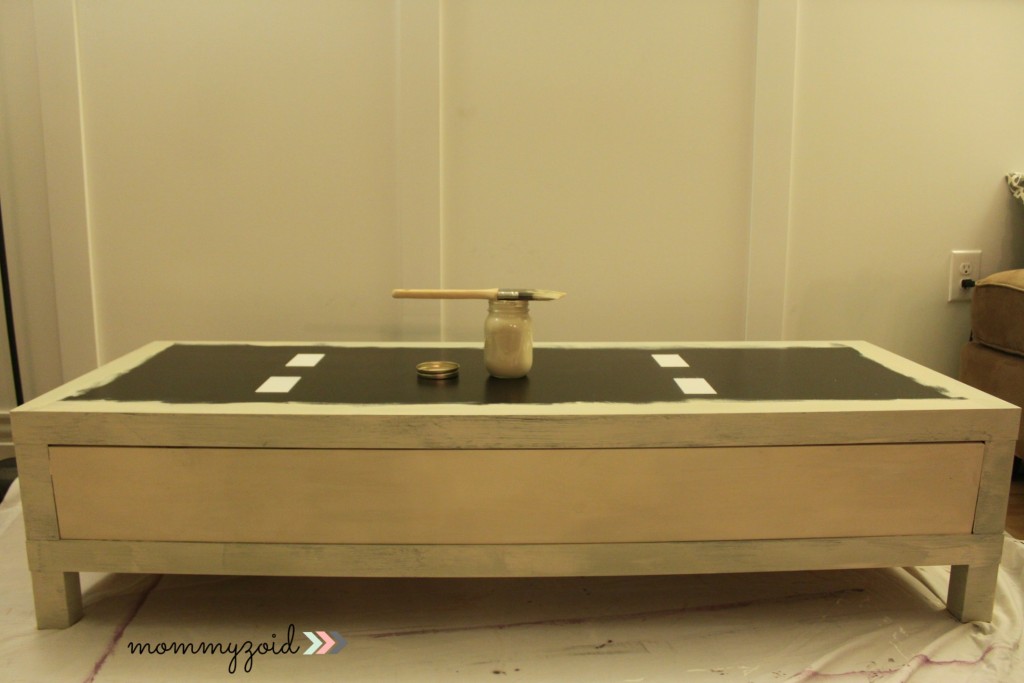
My husband has done a lot of painting and was so impressed with how well Chalk Paint™ went on. He said the thickness of the paint was what made it a dream to work with. The paint was dry to the touch in about 30 minutes!

Once the paint was dry he applied the Clear Soft Wax with a lint free cloth, although you can use a brush. He applied the wax in small areas making sure to work the wax into the paint until the whole bench was completely covered. The purpose of the wax is to preserve and protect the paint. The wax was dry to the touch shortly after it was applied. Once the whole thing was waxed he took a piece of 120 grit sand paper and lightly distressed the edges and random spots on the surface of the bench.

Ikea Hack via www.mommyzoid.ca

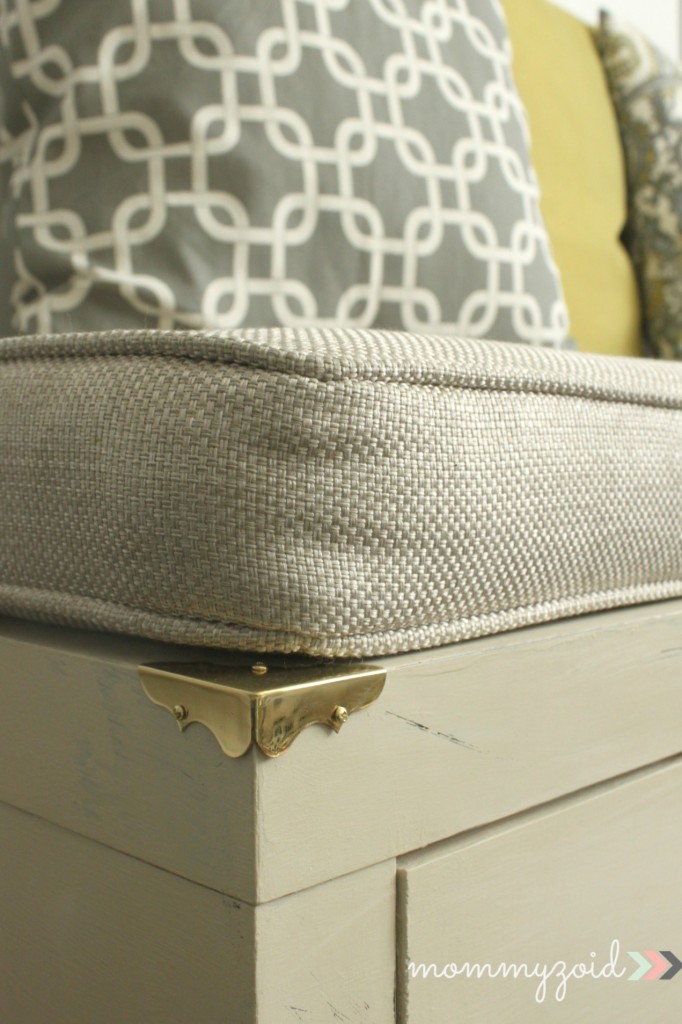
To finish it all off he added some brass corner hardware from Home Depot . For about $5, these little corners add so much pizzaz and really kicked this project up a few notches. I find it really plays off the decorative knob on the door.

Ikea Hack via www.mommyzoid.ca Ikea Hack via www.mommyzoid.ca

Ikea Hack via www.mommyzoid.ca Ikea Hack via www.mommyzoid.ca Ikea Hack via www.mommyzoid.ca
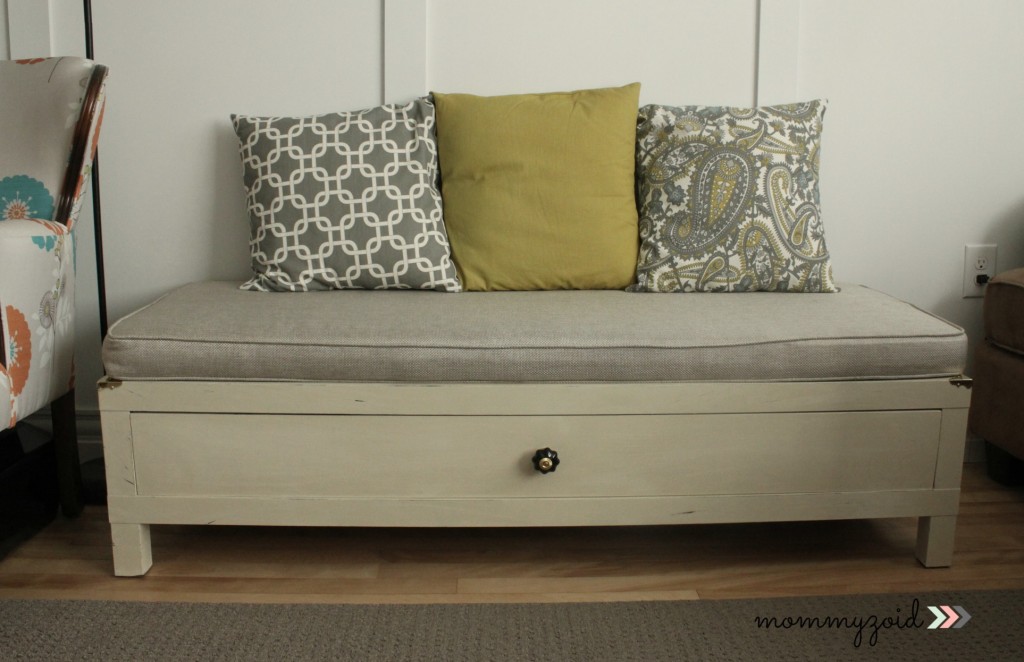
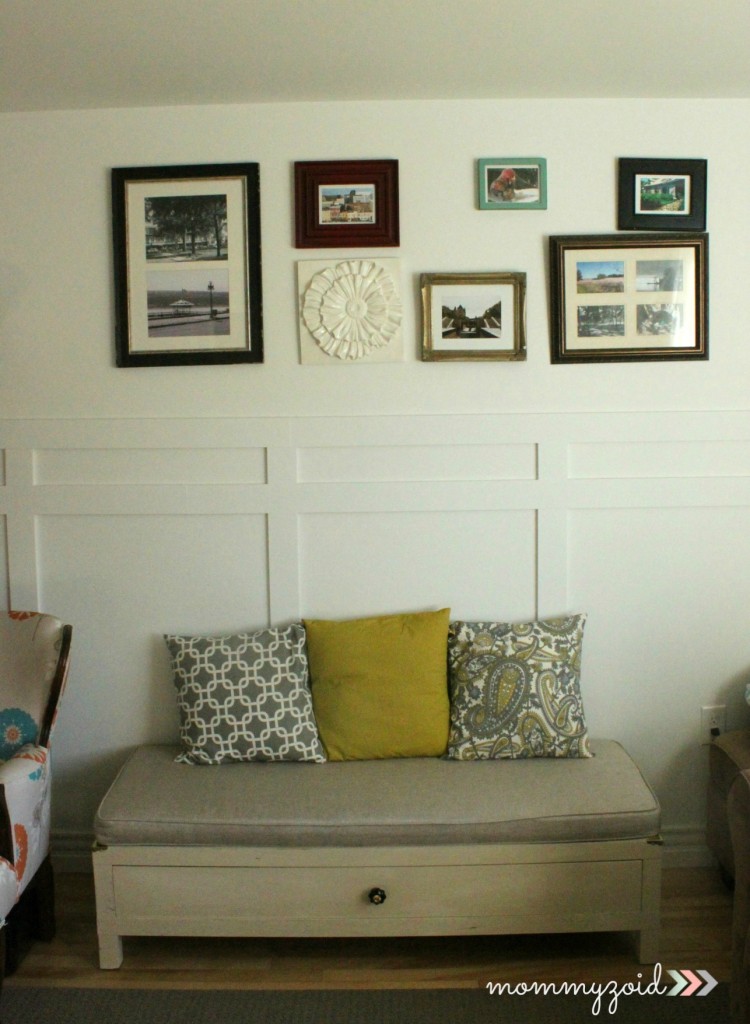
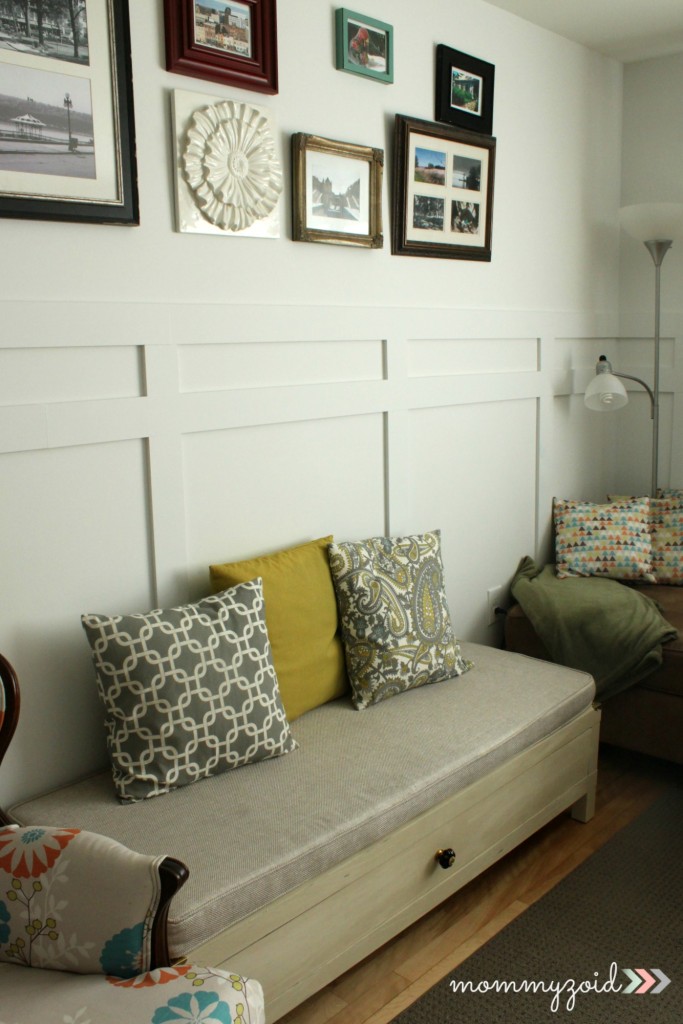
What do you think? Did he do a good job giving this basic bench it’s fourth life? I am so happy we’ve saved this from entering a landfill yet again.

Stephanie @ Mommyzoid

PS: I’ll be sharing this post on these amazing blogs =)

Baby , DIY

DIY: Play Kitchen Rescue

December 15, 2014

A few weekends ago we were driving downtown and I spotted a children’s play kitchen outside someones house on the curb, waiting for garbage day. I told my husband how cute it was but he didn’t seem to think anything of it. Little did he know in a few short hours that dirty old children’s toy would be occupying a corner of his dining room.

kitchen 1 logo

So we get home from town and I announce I’m going to get that kitchen from the side of the road. I don’t think he believed I would do it. I was determined to fit that sucker in the back of my car. Thankfully the guy who formerly owned it (I assume it was his kids?) helped me load it up. I managed to get it up the stairs and into the condo. The first thing I did was pull it onto the deck before the grossness of it fell off into our home.

It turns out this sucker is made by Kid Kraft … Pricey stuff! First I unscrewed all the cabinets and stuff. It had like a thousand different shapes and sizes of screws in it. What a mess!

kitchen 8 logo

To clean it I used HOT water and a glug or two of bleach (who know’s what that measurement is!). I used a sponge and gloves in order to scrub the you-know-what out of the thing. There was pine needles and pennies stuck to the bottom of the drawers. SO GROSS.

The goal was to get it painted Sunday, let it dry over night inside, and then put it together on Monday at nap time. I had the best intentions. Two-ish weeks later and IT’S ALL DONE, thank god. It was taking up some serious real estate in the dining room.

I painted the kitchen white and I painted the hardware with the same paint we used to paint our sons room. It was tricky to paint the plastic but it ended up working out.

Although it’s not perfect (I didn’t think I needed painters tape), I am in LOVE with it. I am so glad I rescued it from the curb and gave it a new life. I know it’s going to be loved in our home for many years to come.

So the next time you see something interesting on the side of the road, do yourself (and your wallet) a favour by pulling over and sussing out the situation. Who knows! It could be given a new life.

kitchen 8 logo

kitchen 7 logo

kitchen 6 logo

kitchen 5 logo

kitchen 4 logo

kitchen 3 logo

kitchen 2 logo

Stephanie @ Mommyzoid

PS: I’ll be sharing this project on these fabulous blogs.

DIY

DIY: Reclaimed Holiday Sign

December 8, 2014

I’ve mentioned before on the blog that space is a premium in our 2-bedroom condo, so we needed to find a solution for the holidays without giving up completely.  We have had a Christmas tree in the condo in the past, but that was before my husband built a custom entertainment centre on the wall that had the space for the tree. With a new baby in the house, we still want to decorate a little bit and feel festive without things feeling chaotic, cramped, or like Christmas threw up everywhere! Our solution was to do a few small DIYs including this reclaimed holiday sign.

We have some left over 150 year-old barn boards from when my husband covered a wall in our kitchen and we’ve been slowly working through the boards making some fun DIYs. My husband grabbed one of these boards and we set to work on our latest DIY.

Here’s what we used:

  • Reclaimed piece of wood
  • Nails
  • Hammer
  • Drill
  • Yarn in red & green
  • Christmas Lights

DIY Christmas Decor via www.mommyzoid.ca

First we marked out where we wanted the nails to go and pre-drilled some holes. It was pretty random and not at all exact but in the shape of a triangle.

DIY Christmas Decor via www.mommyzoid.ca

See? It looks like a tiny little tree! Certainly not exact or perfect. Once we pre-drilled the holes we put the nails in and tapped them in gently at all at the same height to keep things uniform. We didn’t want the nails in permanently in case we want to do something else with this board in the future, so we didn’t hammer it in too hard.

DIY Christmas Decor via www.mommyzoid.ca

Next we wrapped yarn around the nails, willy nilly. Seriously, there was no rhyme or reason, but we really liked the way we did the first one so we kept doing it to keep it uniform.

For some added pizzzzaz we drilled holes in it and popped Christmas tree lights through each hole. It gives such a pretty glow, especially when the lights are out.

DIY Christmas Decor via www.mommyzoid.ca

Does it distract from the massive TV that takes up our living room? A little bit? That was the goal!

DIY Christmas Decor via www.mommyzoid.ca

Stephanie @ Mommyzoid

PS: I’ll be sharing this DIY on these blogs.

DIY

DIY: Singer Sewing Table to a Desk

December 1, 2014

Up-cycle an old sewing machine table into a desk via www.mommyzoid.ca

We bought our 2 bedroom condo with no intentions of still living in it when we had kids but we knew if we had to we’d make it work. Now here we are 4 years later with a new baby and no plans on moving out any time soon. We’ve made our small space work really well for us. We live a really minimalist life, which helps!

With the addition of our little boy came the subtraction of our office. We kept a futon, a rug, some shelves and a desk in it. It wasn’t anything crazy. Now we occupy that room! So I wanted to make a space where I can escape to at nap time. A place hidden from the chaos of new baby life where I can close the door and work.

When I went to my husband and expressed my desire for my own space, he let me know he was already thinking about just that and asked me my thoughts on sewing leg tables. Yup. Like VINTAGE Singer sewing machine table legs. With a slab of reclaimed wood. My immediate answer? YES! A hundred times yes. So he did it for me! He went on Kijiji and scored a machine with the legs and took off the machine part and re-sold that on Kijiji and kept the legs. After that it was a simple case of deciding how long and deep we wanted the desk to me, staining it, and attaching the top. BOOM. Done!

office collage before after I love it even with the original sewing machine top! I would have loved to give it a whirl before it was dismantled!

Up-cycle an old sewing machine table into a desk

My husband found this board at the cottage. It’s GORGEOUS and so much thicker than the picture makes it seem.

featured office

Check out that corner of our bedroom before. Not much to look at is it!? Pretty bare bones.

Up-cycle an old sewing machine table into a desk

Scrappy Garland DIY via Mommyzoid

Like that little scrappy garland? Find out how to make your own here !

Stephanie @ Mommyzoid

I’ll be sharing this post on these fabulous blogs.

DIY

Scrappy Garland

November 14, 2014

It’s safe to say in Canada we’ve flicked the switch from “Happy Fall Ya’ll” to Christmas. I bet that’s a bit hard to believe for all my American followers that still have a little bit to go until Thanksgiving. Our family is somewhere in the middle. We are embracing a slow and early start to the Christmas season but I’m still enjoying no snow on the ground… CAN WE HAVE BOTH?

Scrappy Garland DIY via Mommyzoid

This week I was looking at my pile of scrap fabric trying to come up with a DIY that could be as much cute as it is useful in using up my scraps of fabric. I give you the scrappy garland ! It’s cheap and cheerful and it’s certain to jazz up a boring space. Here’s what you’ll need:

  • Twine
  • Sissors
  • Scraps of fabric

I cut my scraps of fabric into strips measuring 2 x 24 inches. You can cut as many as you’d like. It really all depends on the look you’re going for. I used 14 for mine.

In order to attach the scraps to the twine you’re going to do a “cow hitch knot”. I’ve provided some step by step instructions below. Loop all your scraps & TA-DA! Your very own garland made of recycle fabric scraps! Look at you, reducing, reusing, & recycling!

Scrappy Garland DIY via Mommyzoid

Stephanie @ Mommyzoid

Baby , DIY

How Cloth Wipes Save Us Hundreds of Dollars a Year

November 7, 2014

wipes6

We’ve been using cloth diapers since birth (see why we decided to cloth here ) and it felt like a no brainer to take the next step and do cloth wipes as well, but with the convenience of throwing out a poopy wipe, it was a bit difficult to persuade me to change up my routine. But once my husband showed me how cloth wipes save hundreds of dollars a year, I was SOLD!

Continue Reading…

DIY

DIY: Wine Rack with Railway Spikes

October 24, 2014

My husband loves DIYs just as much as I and without our mutual love, none of our DIYs could be possible mainly because anyone who enjoys doing it themselves knows a creative mind thrives in chaos and believe me, our house is always littered with glitter, power tools, and my bits and bobs. Most of the time those things are put away but it feels like majority of the time I’m tripping over cords and various crafts in various stages of not doneness.

Continue Reading…

DIY

DIY: Birch Candle Holder

October 10, 2014

For Oliver’s 4 month birthday we took a journey to East Sooke Park for a hike. While we were combing the beach for treasures I found a chunk of bark from a birch tree and my DIY brain kicked it into full gear and I before I knew it I had created this DIY in my head. I crafted this little gem in less than 5 minutes once I got back to my mom’s house in BC where we were visiting. I gave her this candle holder as a little thank-you for having us stay with her for two weeks.

Continue Reading…

DIY

DIY: Wood-Round Path

October 3, 2014

When your family cottage doesn’t have flushing toilets, an out house with a view is a must. This summer Reid and his father built this amazing outhouse right on the water. After the new out house was built, Reid and I cleared a path and decided to jazz it up with a wood-round path made from some sliced up wood rounds and some reclaimed bricks. The sliced up wood rounds were cut up with a chainsaw in roughly the same thickness. We love how it turned out. Next summer we will likely lift up the wood rounds and put landscaping cloth underneath so weeds wont grow around the wood rounds and bricks. That will help keep the maintenance down when it comes to the path.

Isn’t that a gorgeous outhouse? I mean if you have to use an outhouse it might as well have a breath taking view!

Wood round out house path Wood round out house path Wood round out house path via www.mommyzoid.ca Wood round out house path via www.mommyzoid.ca

What do you think of the idea? Does it work for the space?

Stephanie @ Mommyzoid