
Why not pimp your desktop or the space around your work area with some inspiration? Hit download and right-click and save the full size versions of this free printable and desktop image to your computer. After that they are yours to do what you wish with them!
For Oliver’s 4 month birthday we took a journey to East Sooke Park for a hike. While we were combing the beach for treasures I found a chunk of bark from a birch tree and my DIY brain kicked it into full gear and I before I knew it I had created this DIY in my head. I crafted this little gem in less than 5 minutes once I got back to my mom’s house in BC where we were visiting. I gave her this candle holder as a little thank-you for having us stay with her for two weeks.
Welcome to another week of Wordless Wednesday where I share a bit of the behind the scenes of Mommyzoid. We are out in British Columbia visiting the family. We took a weekend trip to Tofino and caught a Women’s surf competition called “Queen of the Peak“!
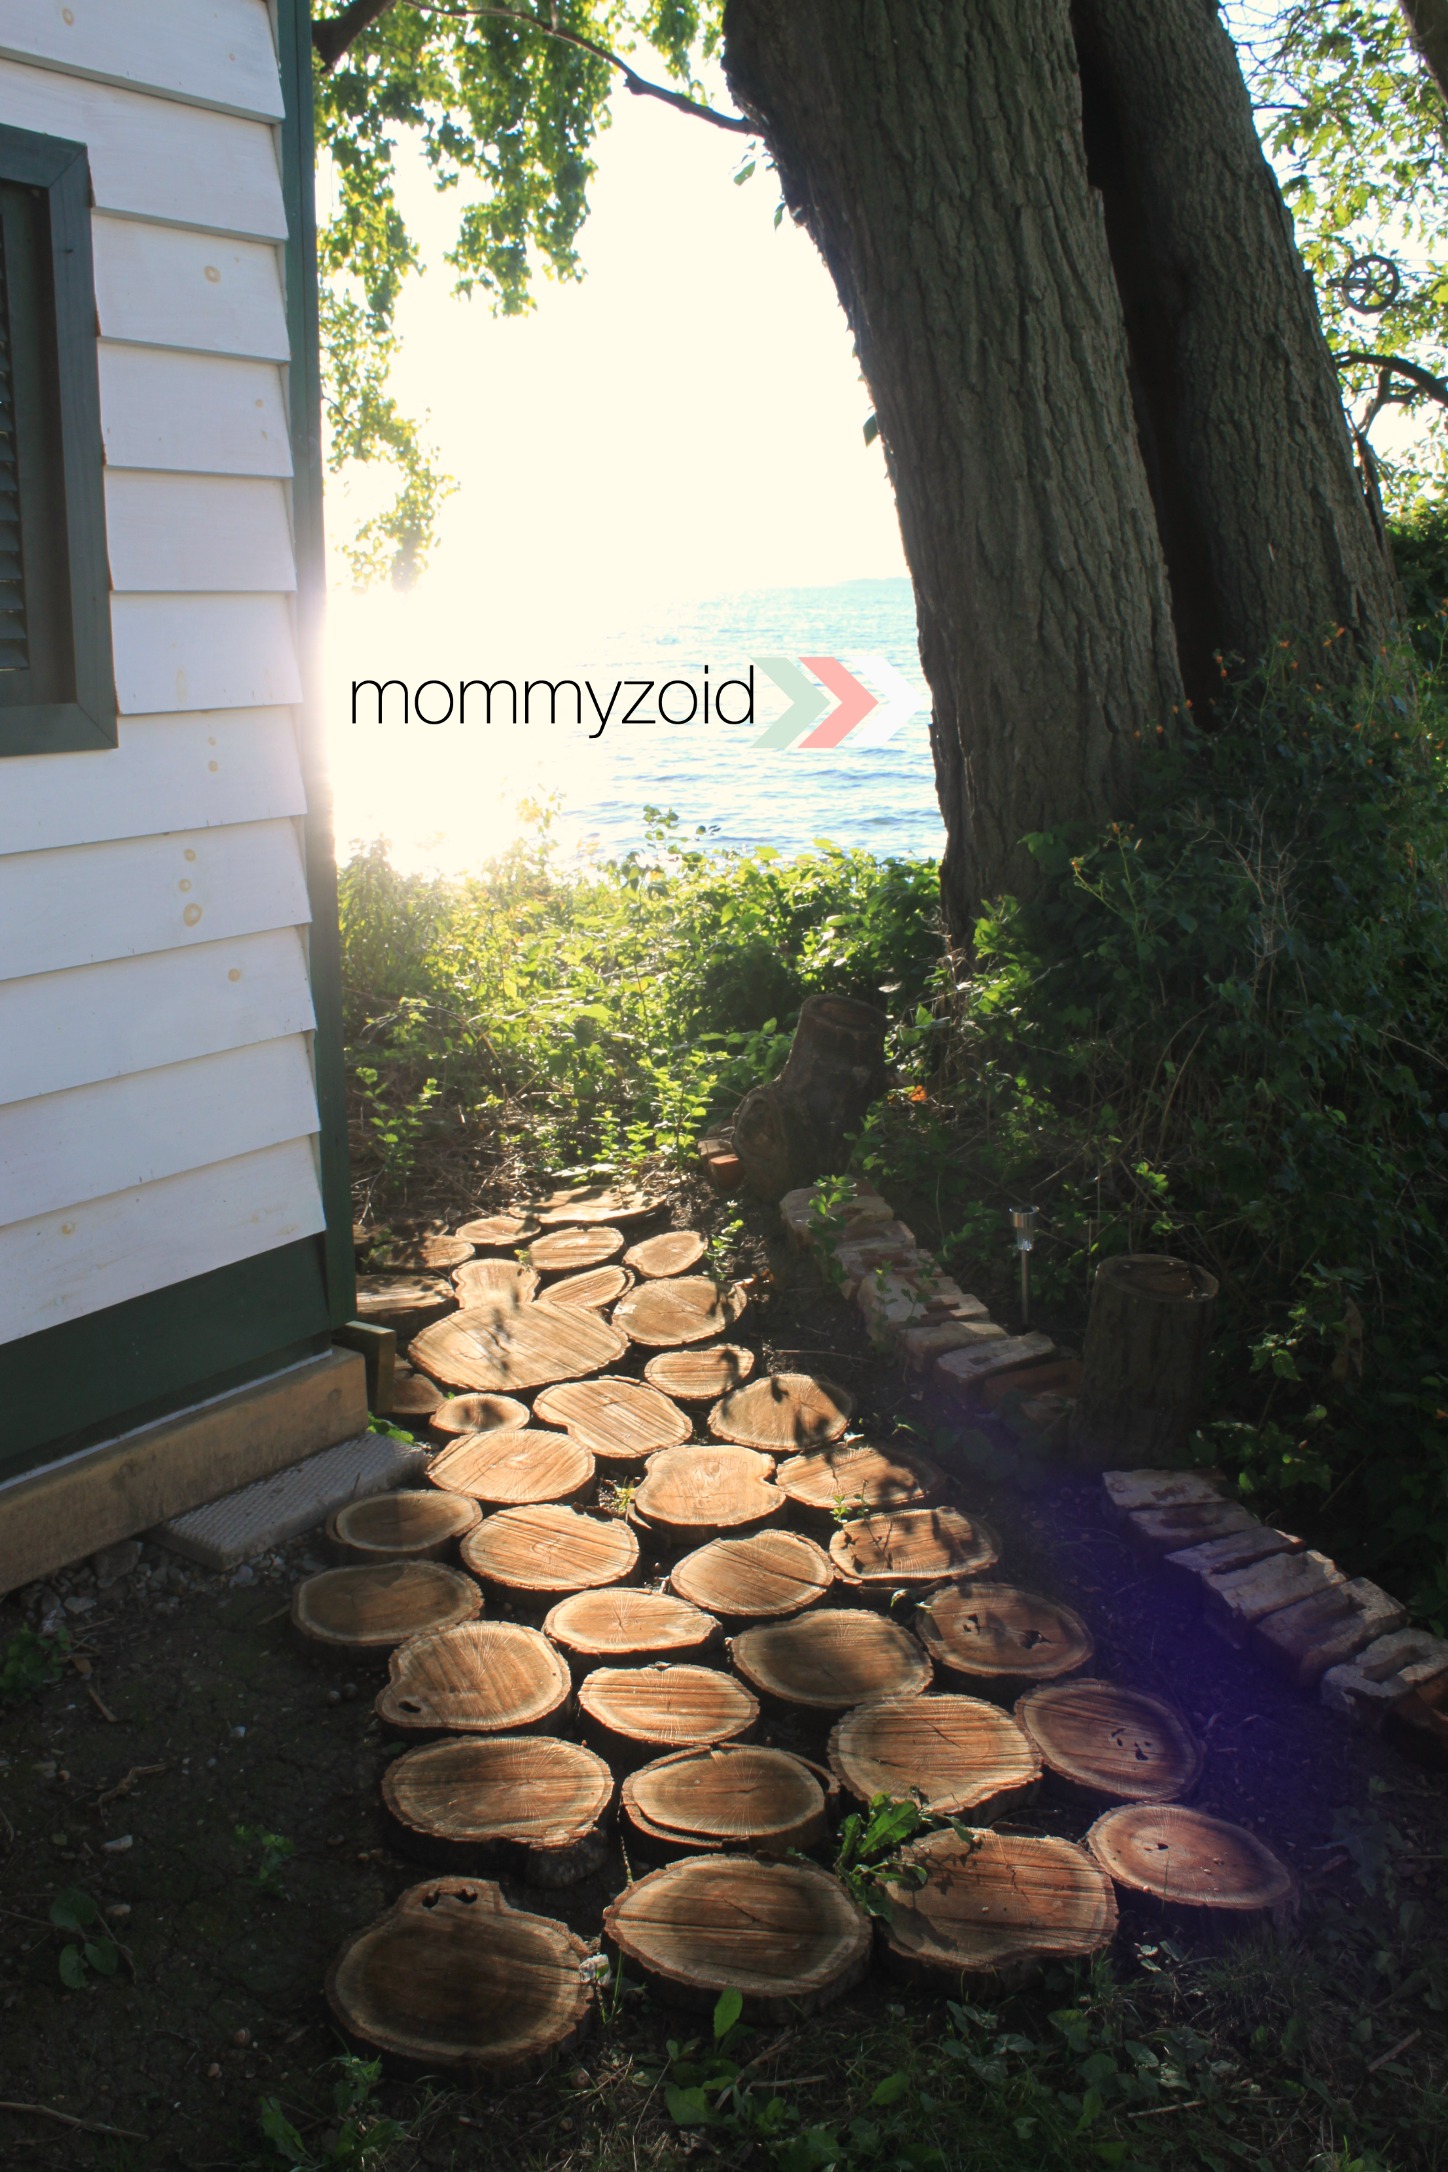
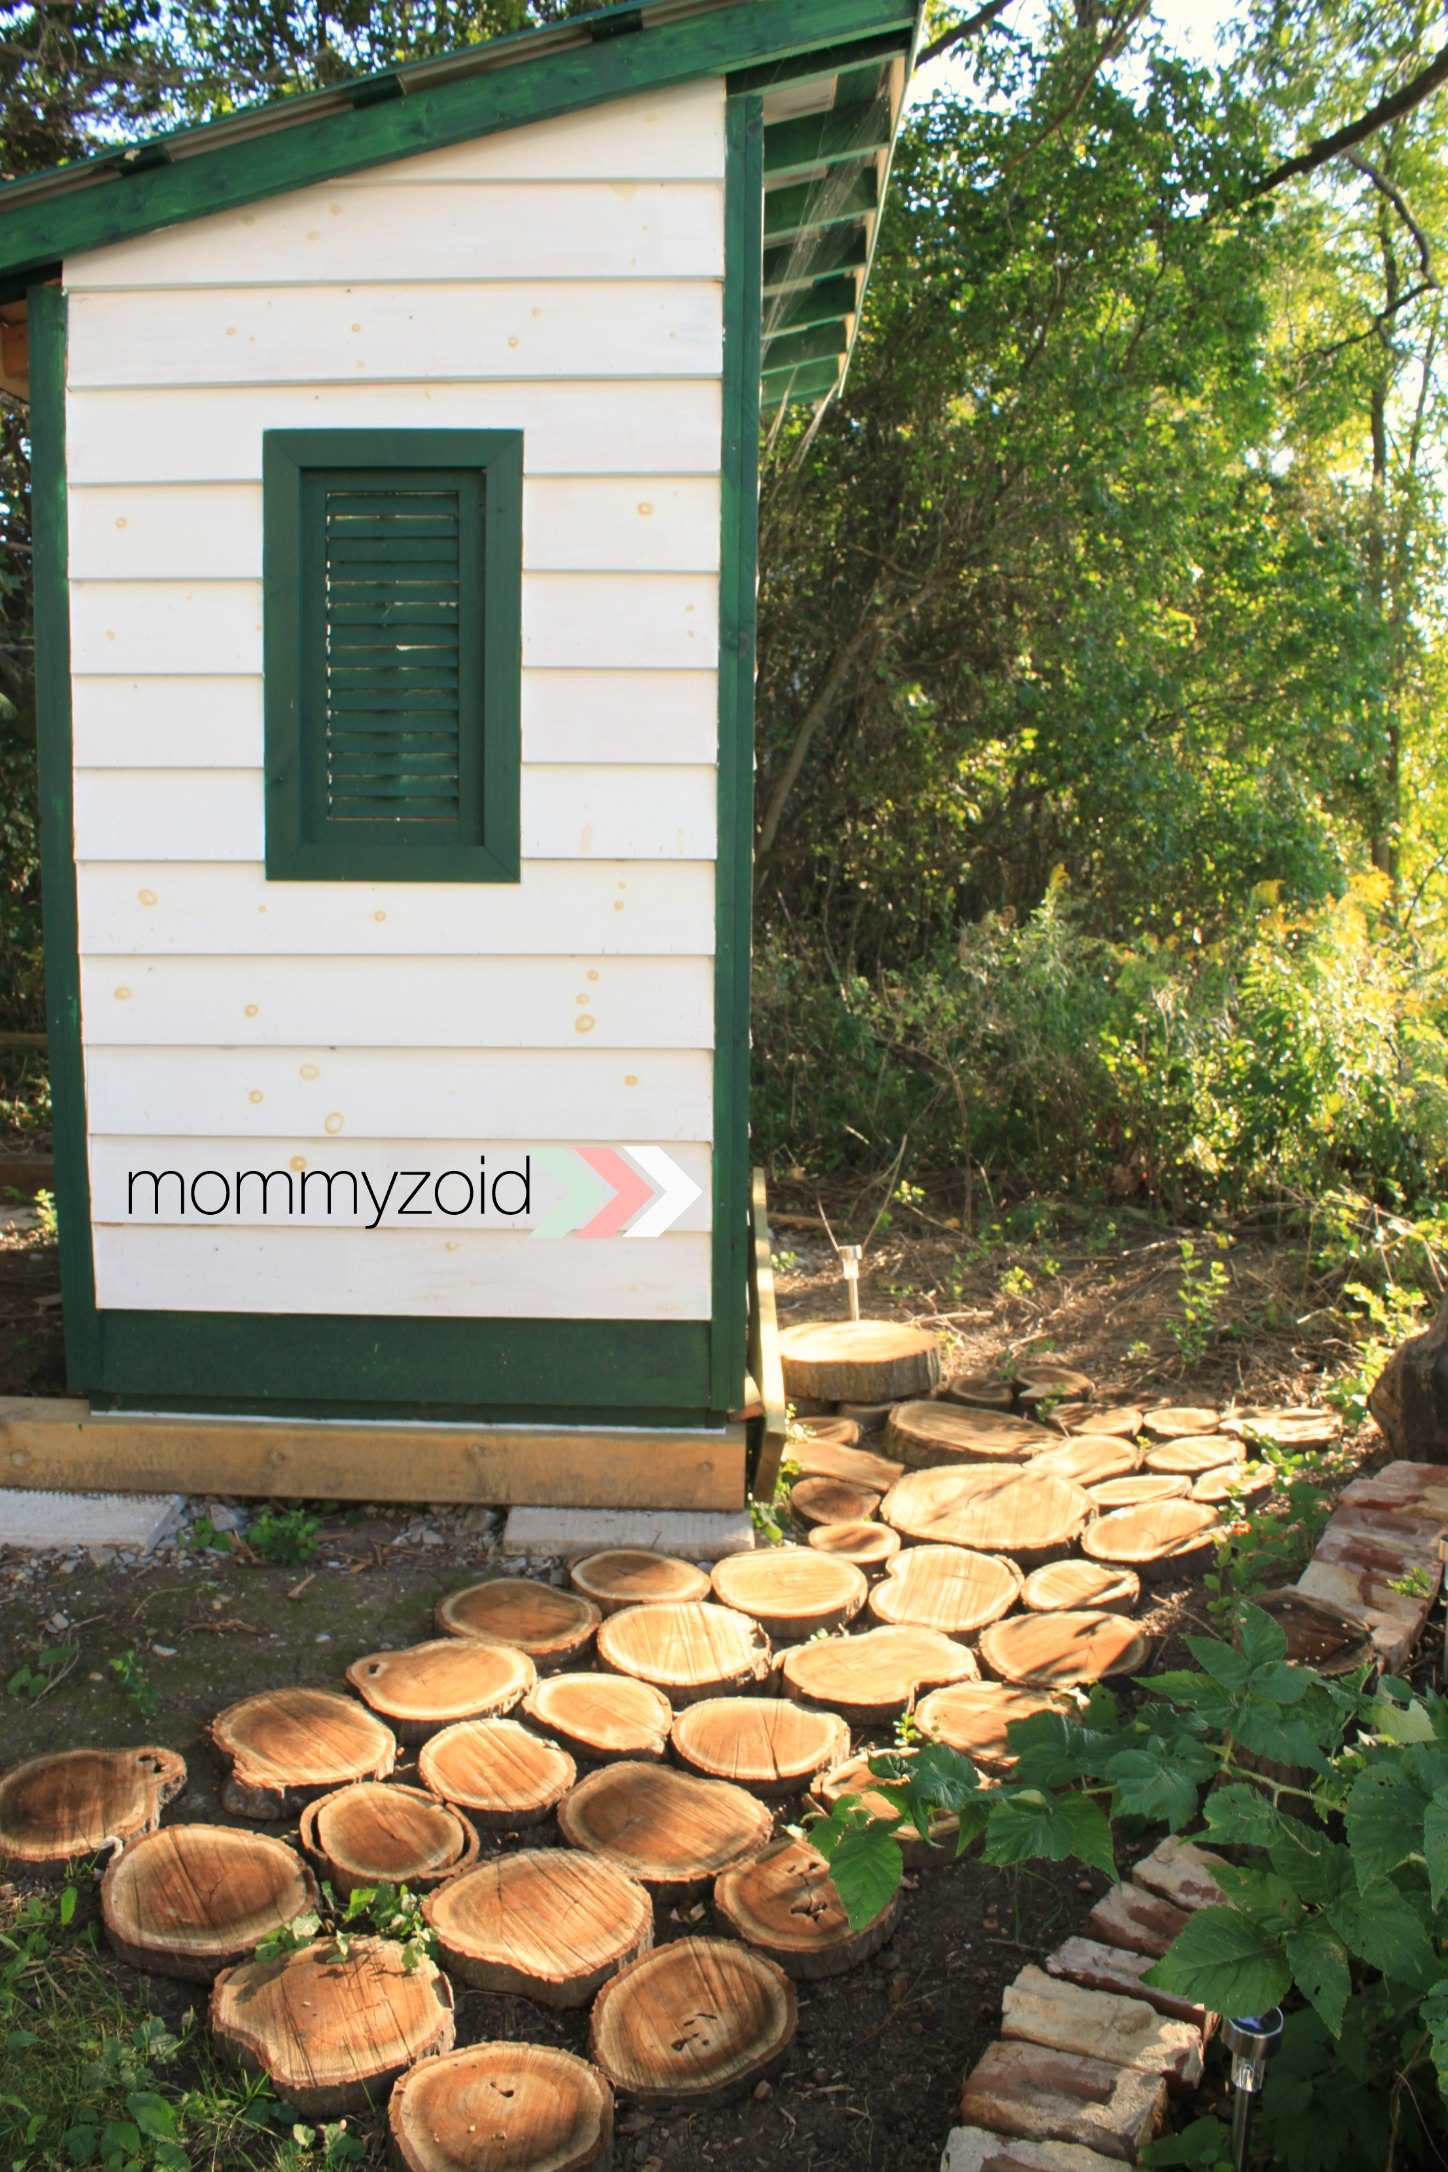
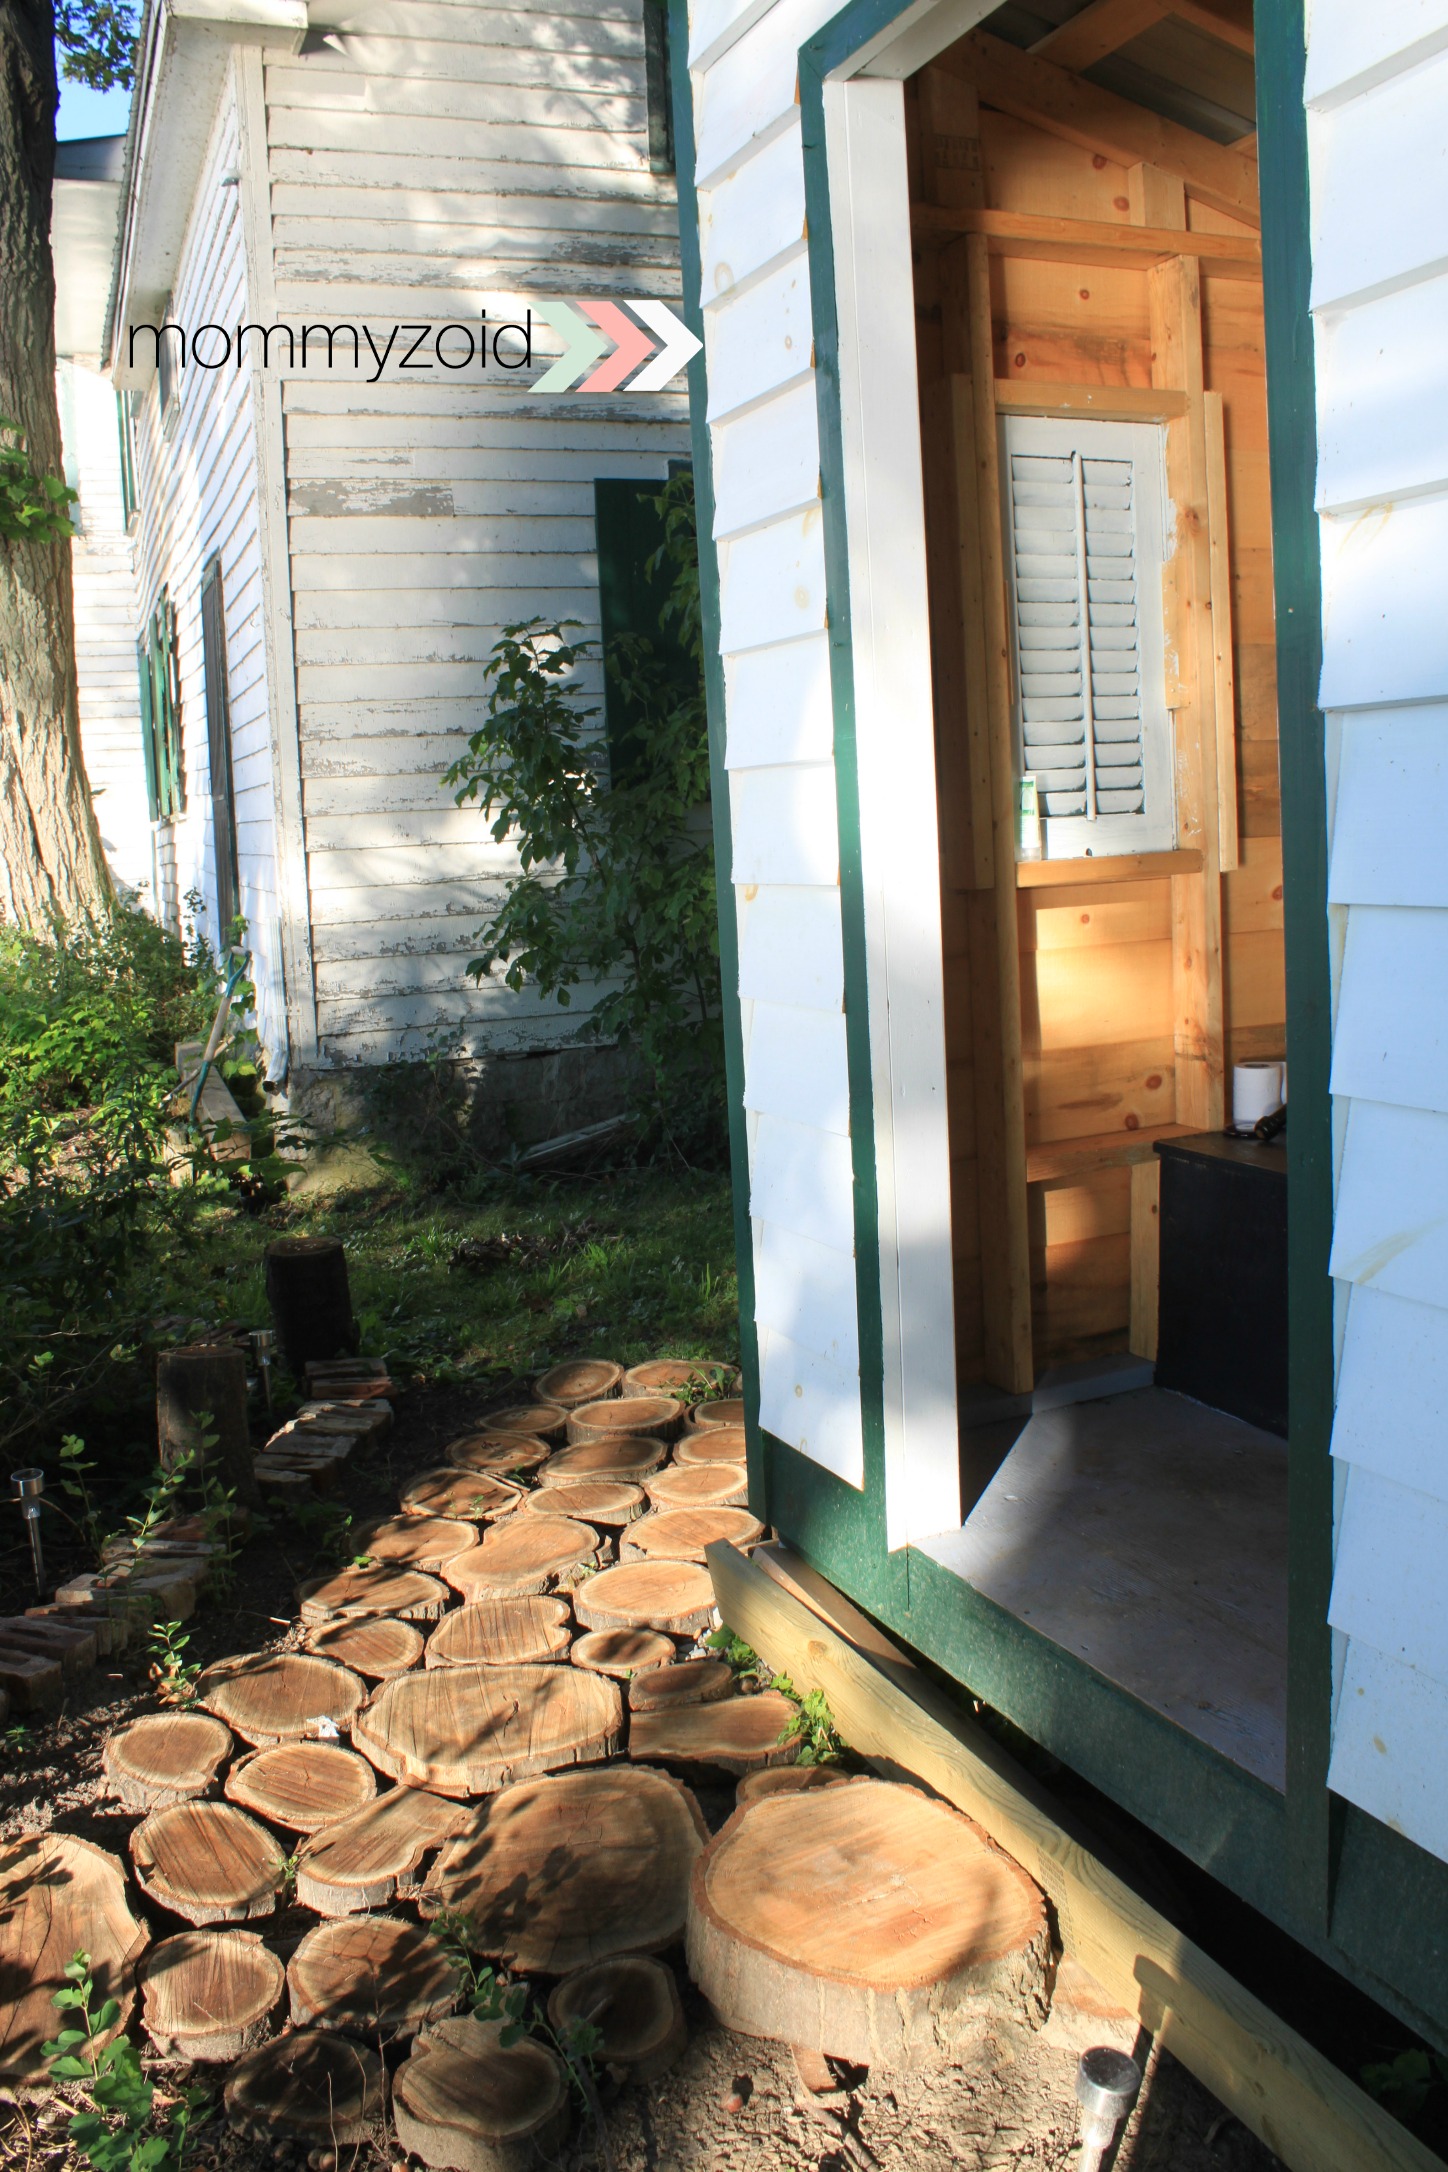
When your family cottage doesn’t have flushing toilets, an out house with a view is a must. This summer Reid and his father built this amazing outhouse right on the water. After the new out house was built, Reid and I cleared a path and decided to jazz it up with a wood-round path made from some sliced up wood rounds and some reclaimed bricks. The sliced up wood rounds were cut up with a chainsaw in roughly the same thickness. We love how it turned out. Next summer we will likely lift up the wood rounds and put landscaping cloth underneath so weeds wont grow around the wood rounds and bricks. That will help keep the maintenance down when it comes to the path.
Isn’t that a gorgeous outhouse? I mean if you have to use an outhouse it might as well have a breath taking view!
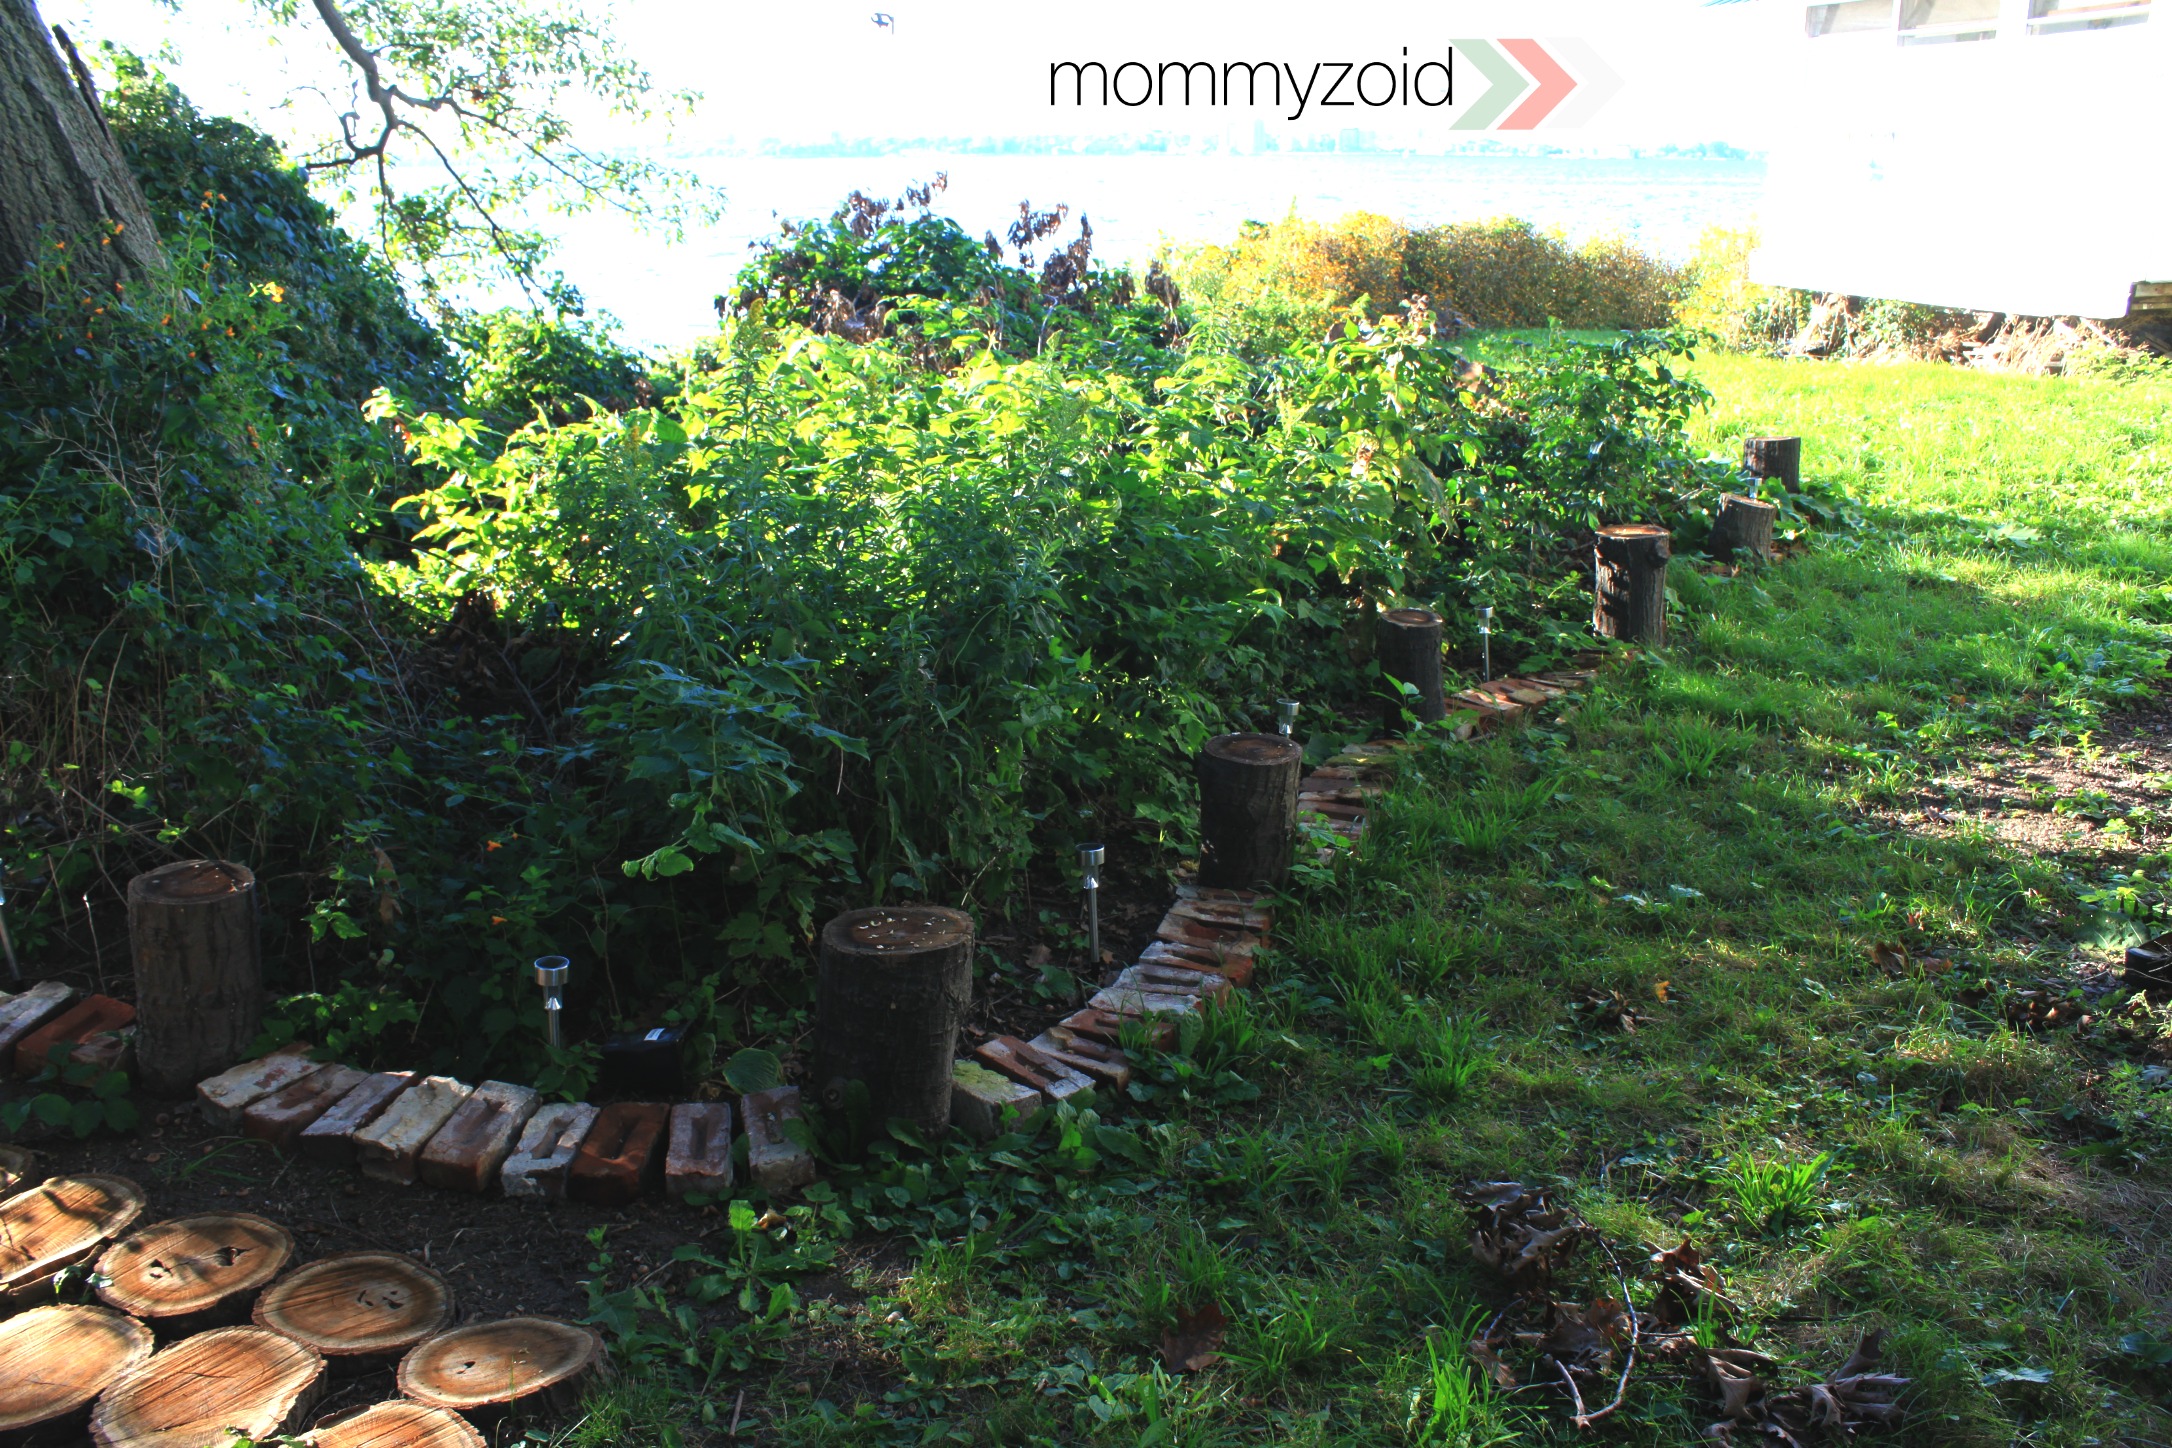
What do you think of the idea? Does it work for the space?


With our immediate family all over Canada, travelling with babies is a reality for us. We had been told quite a few horror stories about flying with a newborn baby but we’d also been given a few pieces of advice that came in handy.
1. Keep baby on usual schedule.
Our three month old isn’t on too rigid of a schedule. This was really handy for us flying through 3 time zones. When we arrived on the West Coast, we were super understanding that our baby would be off when it came to his sleeping and napping schedule. We tried to keep things as close to normal for him.
2. Keep baby sucking (nipple, bottle, soother) during take off and landing.
This helps with keeping baby from having sore ears. For us as adults, chewing gum helps but poor little babies need to keep sucking in order to help their little ears. We kept our guy sucking during take off and landing and we had no problems. Once we got moving, he was fast asleep.
3. Know the difference between a non-stop flight and a direct flight.
These sort of travel details didn’t matter much before having kids but now that diapers, bottles, and crying babies are involved, the faster and more direct we can get to our destination the better. When booking this flight we paid extra for a direct flight but had no idea it wasn’t non-stop. Direct means you and your bags stay on the same airplane from beginning to end but you will make some stops along the way — it’s quite the milk run! Non-stop means you wont have any stops and you’ll pay a premium for that if you’re flying quite a distance. We enjoyed not having lay overs or having to unload and re-load back onto a new plane.
4. Read your airlines policies and tips on flying with kids.
Airlines and flight attendants have a lot of experience with children and it’s old hat to them but when it’s your first time flying with your baby, it’s nerve racking. To help ease our minds we read online how flying with a little one works. It laid out everything we would need to know from where to find a change table on board to what to do in the event of an emergency. and when it doubt, ASK! *PRO TIP* find out about baggage limits and gate checking strollers and car seats! Gate checking means you have it up until you hop on the plane and you pick it up when you get off. Some experienced mom’s I know have told me this can help prevent any damage to your gear!
5. Read TSA or CATSA policies on getting through security with an infant.
The biggest stress for me when it comes to flying is getting through security. We were surprised to find out we got to cut to the front of the line when we got to security. The less time we can spend waiting in line with a baby the better. He loves to be kept moving! I knew what to expect when going through security ahead of that time and that defiantly eased my mind. I was surprised to find out I was able to travel with pumped breast milk, formula, and even a water bottle of water for mixing with formula. All the security people were super understanding that we were slower than the average traveller.
What are your tried and true travel tips? What makes your travels stress-free?
Happy travels!
I’ll be sharing this post on these blogs this week!
Every Wednesday I’m going to share a few shots from Instagram from the previous week to let you have a glimpse into our world. Go ahead and follow @mommyzoid for many more pictures!
Follow @mommyzoid on Instagram for more peeks into our world!
A welcome addition to the front porch of my families cottage is this driftwood chandelier, another DIY that makes something wonderful out of virtually nothing. With a few coats of paint, some fun outdoor throw pillows, and a few DIYs this porch has become the centre of attention. It has become a place that not only looks like it’s out of Cottage Life Magazine but feels warm and inviting. It’s a space that is conducive to gathering which is a popular activity at the cottage. Many a days have been spent reading magazines, doing puzzles, and hosting get-togethers under this here chandelier.
This cute DIY is the brain child of my Mother in Law and my Husband with a little bit of know how and designing from my Dad and his wife. A family DIY! Neat! Without further ado, here’s what you’ll need.
- Rope of prefered colour/size/length
- Drill
- 3 lengths of Light chain
- 3 Hooks
- Hammer
- Wood Staples
- Heavy-duty hook for ceiling
- 3 hanging tea light holders (ours are from IKEA)
First decide on a piece of driftwood to use. It can be as big or as small as you’d like. Remember it has to hang from the ceiling so you might want to take that into consideration.
Now this wasn’t an exact science, at least that’s the idea I got from the sidelines while watching this family DIY go down. I’m more of a thinker-uper than a get-et-done-er! Drill two holes wide enough for your rope to slide through and tie a tight knot or two large enough to keep the knot from slipping through the holes.
On the underside of your piece of driftwood, use wood nails to secure your piece of chain. Make sure your chains are evenly spaced for balance purposes but again, it’s no science. Eye ball it!
Now fix those hooks on the end of the light chain (this is where you’ll hang those little lanterns).
Next comes the finicky part and that’s hanging up the chandelier so that it’s balanced and doesn’t look lop sided. That’s where my Dad came in. He adjusted while the women stood back and said, “A little more on the left… no….stop…OK….nope, MORE!!”
and TA DA. Isn’t it cute?
I’ll be sharing this DIY on these amazing blogs!
**This post contains affiliate links, and I will be compensated if you make a purchase after clicking on my links**
I have always been one to either forget all the important stuff or over-pack. Thankfully since becoming a mom, I’m doing more of the latter and less of the former. When it comes to our diaper bag, I am a stickler for keeping it organized and having a place for everything. The Ju-Ju-Be Be Prepared makes this possible. It’s got more pockets and pouches than you can shake a stick at.
For a cloth diapering family, this bag gives us ample room to stick all those big fluffy diapers. Our previous bag wasn’t cutting the mustard when it came to carrying cloth diapers. Either the diapers or the bag had to go and guess who stuck around. The bag comes from JuJuBe’s new Legacy line. The whole line is very elegant and classy. I love that they are very neutral in colour (read: go with anything). This bag is my new purse so it can’t clash with my outfit, ya hear?
If you think the outside of the bag is insanely awesome and to die for, the inside will blow your socks off!

In the top pouch we keep garbage bags and our wet bag. I made this wet bag using scrap fabric from our decorative throw pillows on the couch and it’s lined with PUL which is a waterproof fabric used in the cloth diapering world.
There are four pockets on the top of the inside of the bag. In one of them we keep a change of clothes (onesie, socks, shorts, etc.) and in another we keep sunglasses, a hat, and a bibdana. On the other side of the bag we keep Homemade Organics by Jen diaper cream, back up soothers, baby tylenol, a liquid tylenol syringe and some baby wash clothes for messes.
Inside the main bag we keep a “hooter-hider” for breastfeeding, an Aden + Anais swaddle blanket , a jacket or sweater, several Charlie Banana cloth diapers
, back up disposable diapers, Huggies Clutch N Clean , and of course Sophie the Giraffe.

There are two pouches on the inside perfect for bottles. We usually stash some Enfamil single serve packets along with some empty bottles. On the outside of the bag there is an insulated pocket on either end of the bag I use to hold pumped breast milk with a small ice pack to keep it cool.

On the very front of the bag is the “mommy pocket”. In it I keep my car keys, wallet, coupons (such a mom!), cell phone and sunglasses.


Wooph. That’s a lot of stuff. But such is the life of a mom, am I right?
What are your diaper bag must haves? Do you think I pack to much!?
PS: I’ll be linking up here with hundreds of other bloggers to share our work!
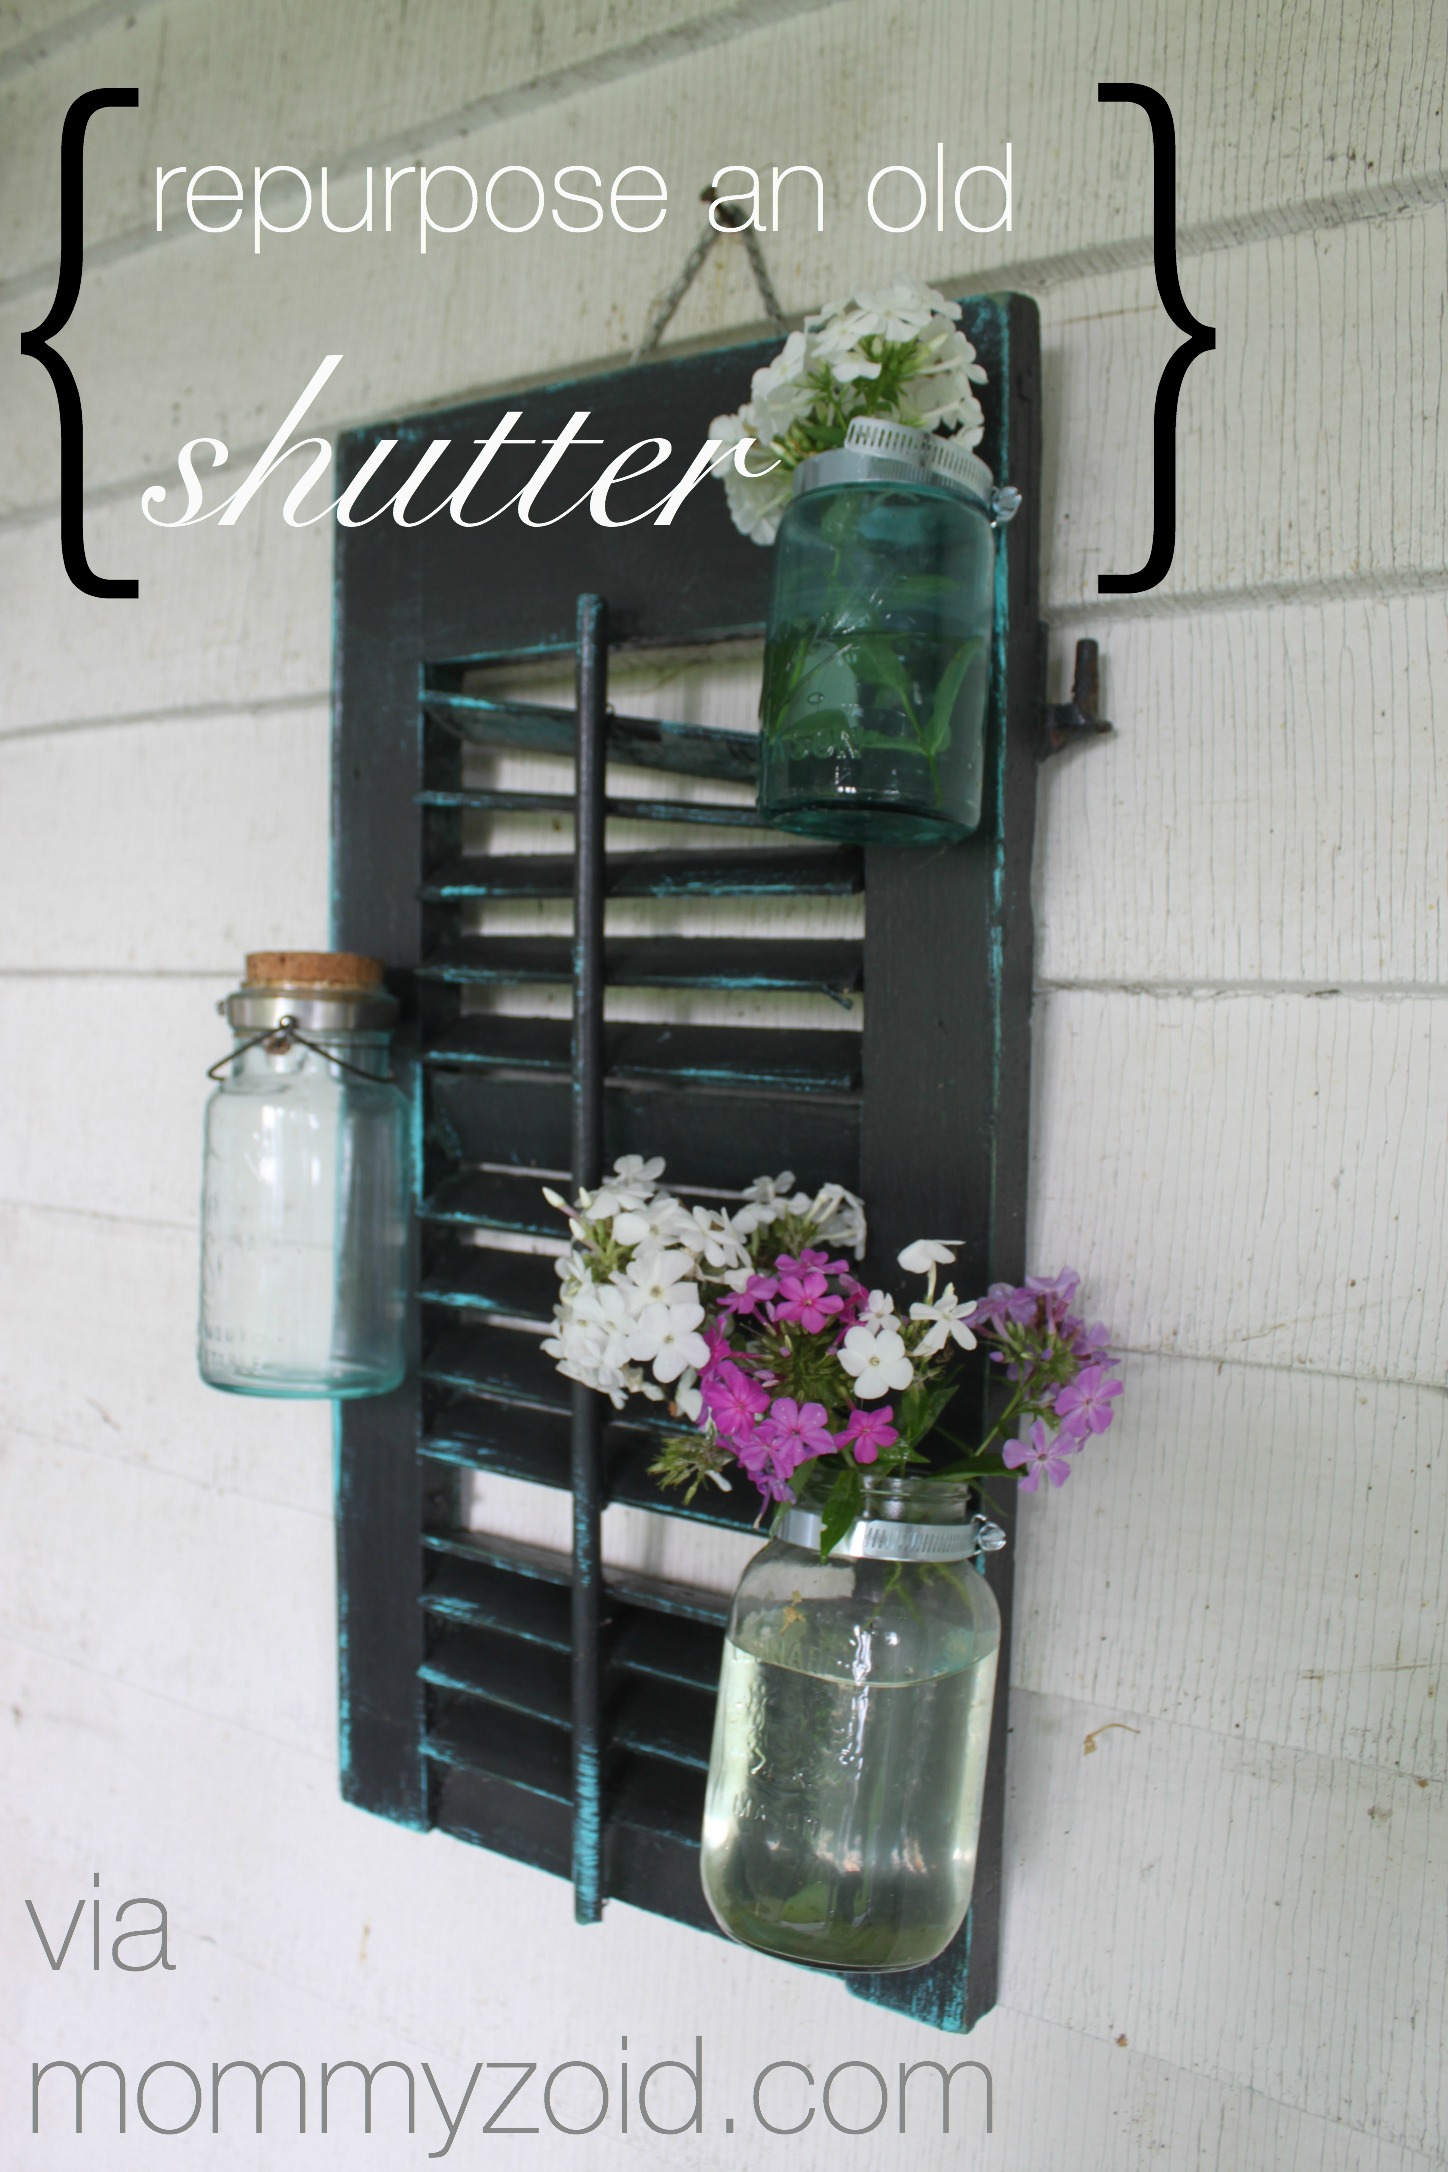
While spending the first few months of my maternity leave at my families cottage, I wanted to do as many DIY’s as I could possibly cram in. My favourite so far has been this shutter that was going to be tossed in the burn pile but I managed to snag it and spiff it on up. This entire project was actually done 100% using items found at the cottage. I love this project because it was free, I recycled and reclaimed, and it looks just so darn cute on the front porch. It’s a fantastic way to jazz up a wall with a punch of colour.
To make one of these beauties for yourself you’ll need:
1 shutter that’s ready for a new life as a wall hanging
Paint of your choosing
Desired length of chain for hanging
2 screws for chain
3 mason jars of various sizes, shapes, and colours
3 jubilee clamps found in the plumbing section of the hardware store
3 screws for jubilee clamps
drill
First I took my shutter and gave it a nice coat of flat black paint and let it dry thouroughly. Then I took my turquoise paint and just feathered the edges to give it a worn effect. I set the shutter aside to dry completely. You could take a light grit sand paper and rough up the edges a bit or leave it as it is.
On the back of your shutter you’ll want to put a hanging mechanism of some sort. I opted for some chain and screwed it in on either side at the top of the shutter. Chain is a great option for hanging something of this weight.
Next I decided where I wanted to place the mason jars on the front of the shutter. I took my jubilee clamps and my screws and got right to screwing these puppies right where I wanted to. This part can be tricky so you might want a hand from an assistant to steady the jubilee clamp while you drill.
Slide the mason jar into the jubilee clamp and tighten the clamp tight enough that the mason jar doesn’t fall out when its hanging on the wall.
Hang up on a hook, fill with water and some fresh cut flowers, and enjoy your repurposed shutter!
Is this something you’d want to try? What colour would you paint your shutter?
I’m sharing this post on these blogs! Take a peek and see what’s happening in blogland!!
and while you’re at it, follow along with me on social media to get a heads up on my next projects.
